
New Spice Rack
At this point, I’m mostly making small improvements.

Making The Spice Rack
I decided to build a larger spice rack and install it under the old one.

Van Interior 2025
This is a good look at the inside of the van looking aft. It seems more spacious than it is, but it’s a home. It’s comfortable.

Van Bed and Couch 3rd Iteration
This is the third and best bed Ive built for the van. It works because I bought a custom bifold mattress, that easily folds in half.
When in couch mode, the mattress is folded and the drawers are closed.
When in bed mode, the drawers are open and the mattress unfolsed making fir just under a full size mattress.
The other advantage is, I increased storage space with the three drawers, and set up from couch to bed is under 30 seconds.

Under Couch Drawers
These drawers make up one side of the mattress. The are on rollers for ease of use, and have restricting line clipped onto the back so they can’t open too far.
They also, have drawer stops so the6 can’t open while under way.

47. Diesel Heater
I installed an Espar diesel heater under the passenger seat. It took me about four days to get it designed, installed, wired, and tested. It wasn’t particularly hard, bit it did require some thinking.

48. Back door garage.
I decided to improve my back door garage area today. I took off the wood panel, and took out the insulation and vapor barrier. No mold, and it looked pristine.
I did a bit of figuring, and began to put the puzzle together. I now have a lot more room for toys and adventure gear. It’s a huge improvement.

New Galley Cupboards
These came out much nicer than my original design. They are stronger. They have better latches. They function much better.


New Countertop

Folded Up Murphy Bed Style
Couch pulled up for table use and easel use.

Couch Mode
Bed mod. No.2. Couch set up when not in use.

Bed Frame At Twin Size.
Bed modification #2

Bed Frame Extended to Full Size
Bed Modification no.2 I remodeled my bed to convert from twin to full size. I can have it folded up or leave it down as a couch.

Installed a massive 48 x 42" drop down easel.

New washing machine!
This was a short lived idea that didnt work very well.. The idea being, I could put clothes and water and soap in the bucket and drive around letting the van motion adgitate and clean. Then when I landed, I could rinse them, hang them up, and have clean laundry.
It kind of worked, but really was more work than going to a laundromat.
This was wayyy back in 2020 when covid was rampant and everything was closed.

Charcoal filtered water!

Spice Rack!
I needed a spice rack. So, I made a van sized one out of pine and installed it aft of the galley stores.

New stove, and a remodel of the counter

54. My new Mountain Bike and Rack
I bought a good mountain bike, and found a good rack to attach it to the ladder. I chain everything down for redundancy from theft and breakage while underway.
The bike’s name is Donkey!

53. The Roof Scheme
Here’s a good look at the roof scheme. Upon climbing up the ladder I step over the tire to the little walk way if I need to access my storage. Note my new bike rack on the ladder!

52. Baking
The fact I can bake homemade pizza and bread in my van makes me smile.

Heating
My van is heated by a marine grade space heater when I have access to electricity, or just strategic baking when I don’t have shore power. Some nights get cold, but that’s where the big down comforter comes into play. The fact that I’m a viking helps too!

Fall Homecoming
With autumn arriving soon, it was time to head south. But not before I enjoyed some fall colors. I love coming home to my van. It’s usually late at night, and the first thing I do is put hook up my electrical system and turn on the lights. It’s a great feeling to have a place to hang your hat.
I bought a classical guitar during the summer, to add to my instrument pile.
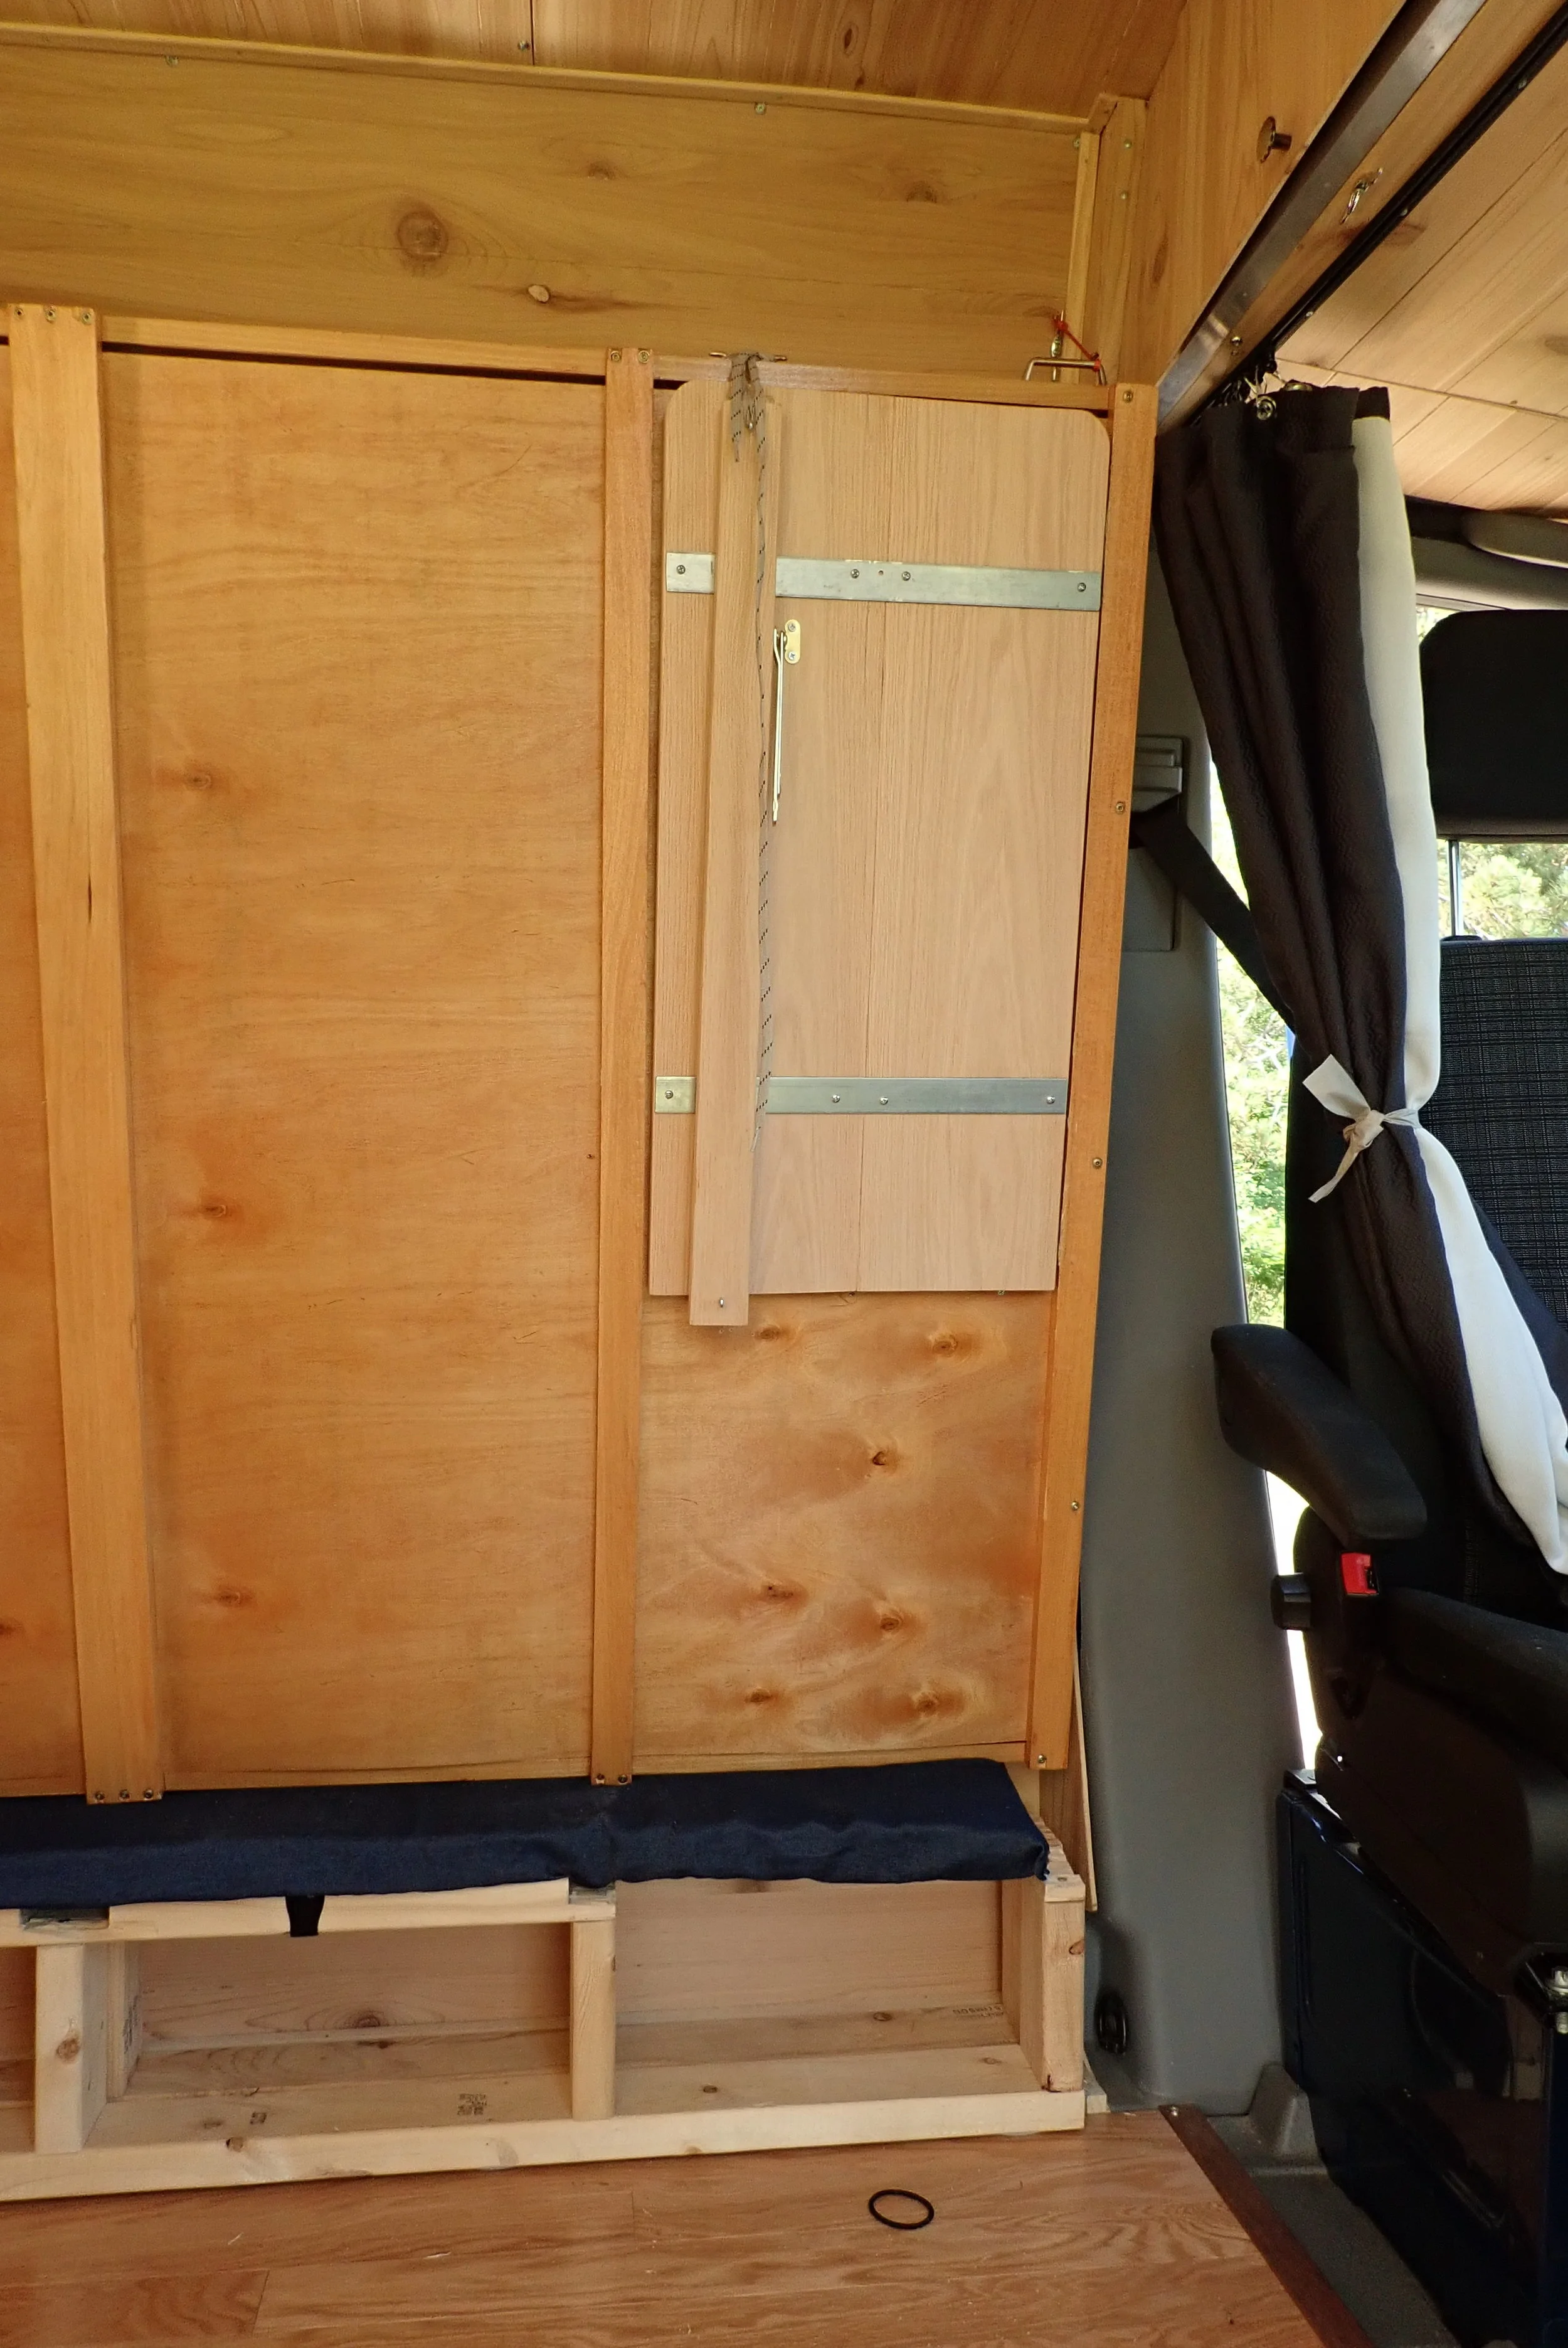
50. Drop Down Table Folded Up
And Here it is folded up. Neatly out of the way.
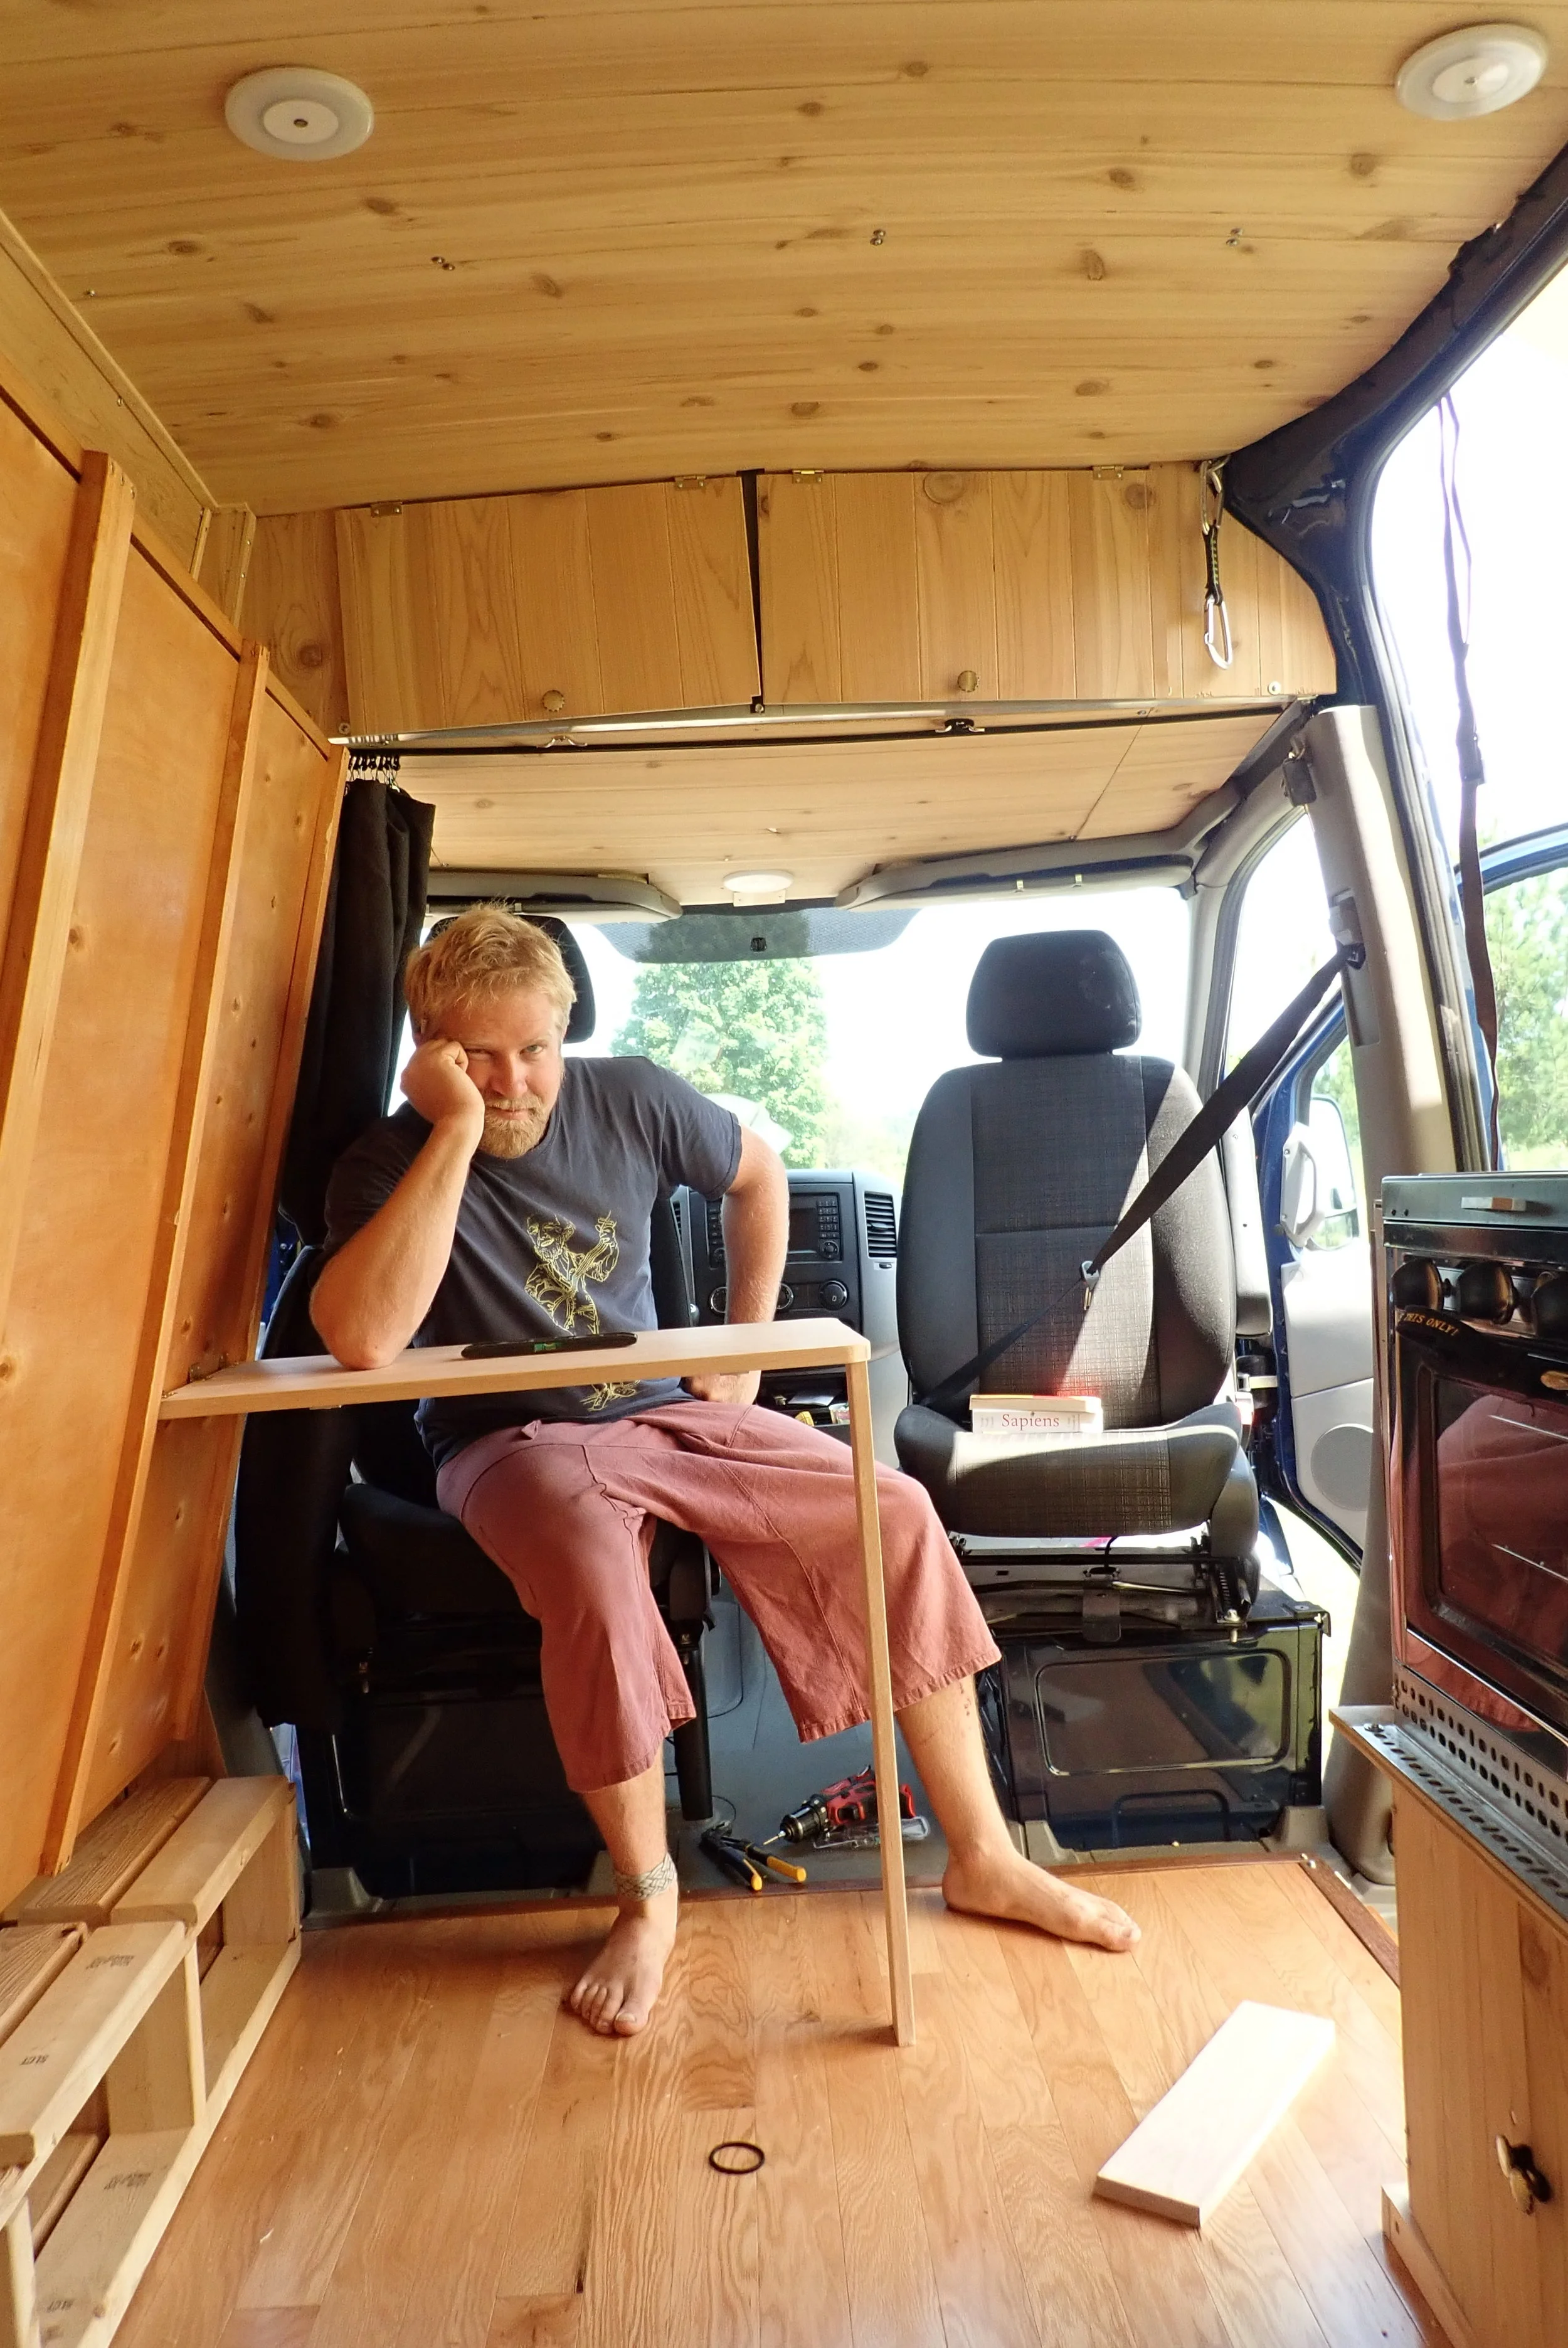
49. Dropdown Table
I saw the need for a drop down table attached to the back side of the bed. So I built one. This was out of oak, glued and screwed together. It’s hinged and secured when not in use, and easily folds down when I want it. I have maximum room when cooking now, and it’s a handy table to draw on or serve dinner to my guests.

48. New Clothes Line
I saw the need for a clothes line to dry my clothes. I used a long piece of para cord to do the job.

51. Magnets
I put on magnets to hold open my cupboard doors…
A simple thing, but man, what an improvement!

42. Galley Cupboard
An almost finished look at the galley cupboard and electrical system readout.

41. Cupboards
The first thing I did when I got back to my van was install cupboard doors on all my shelves and galley. This was necessary to all of my crap from flying everywhere. I also installed some curtain track, so I could sew up some curtains for the windows. At night, everyone could see what Thom was up to while his lights were on. It was a bit like living in an aquarium.

45. The Hammock
One of my first thoughts when I was designing the layout was that I wanted a hammock. Good idea, me!

43. Navajo Rug
After a week of work, I hit the road again. This time heading to northwest New Mexico and Shiprock. I’ve always admired the Navajo weavers, and wondered if I could find a rug. I liked the design of this one, and decided to get it as an early birthday present to myself… It looks great on the hardwood.

44. Finished! More or Less
The van was more than less done. It was late April, and I had started in Late August. During that time, I had spent more than 450 hours (and counting) working on my van.
I still had a few little projects to do, but nothing major. I patched the leak in my water tank. I made plans to swap out my paneling when I got back to Michigan.
From here on, I would be mostly traveling, taking on projects once or twice a session on my own terms. Let me tell you, it felt great to be done.
I grabbed my banjo, and started playing the sunset wherever I was.

40. Road Tripping
I enjoyed two weeks of good van life. I learned that I really needed cupboard doors, as all my shit would go flying across the van on even the most gentle curves.
One of my water tanks leaked. I really wanted to replace my walls with cedar panels like my ceiling.
I loved the lifestyle. I went hiking in the mountains. I ran through the desert. I cooked my meals. I read my books. I sat in my hammock watching the birds. I learned to love this van.
The biggest jobs were done. It was time to go back to work. I was running very low on funds. I had survived my financial storm, and now my van was in Albuquerque.

46. My First Clothes Dryer
My ladder is very useful. In this case, I turned it into a clothes dryer.

39. My First Night Out
It was a great feeling to finally take to the road! I made Thai fish cakes for dinner, and slept amazingly. This was a good start.

37. Finished Murphy Bed
My Murphy Bed came out great! It’s just under full size. It folds easily and secures to the wall on two cleats. On the two layers of closed firm cell foam, I put another 3 inches of soft foam mattress topper. In the summer, I rock a quilt, in the winter, a big down comforter.
My sleep is amazing, and I love waking up in beautiful places.

38. Ready For Testing
In late February, I was ready for a break. All my main systems were in and working. There was a lot of trim work to do, and I wanted to make cupboard doors, but all that could wait. It was time to take this beast out on the road!
I cleaned up my mess. I cleaned the van. I stowed everything away. I filled up on food, water, and supplies.
I gave my friends a hug, and the next morning, I hit the road. I was headed west to New Mexico by way of New Orleans, and Big Bend National Park, Texas.
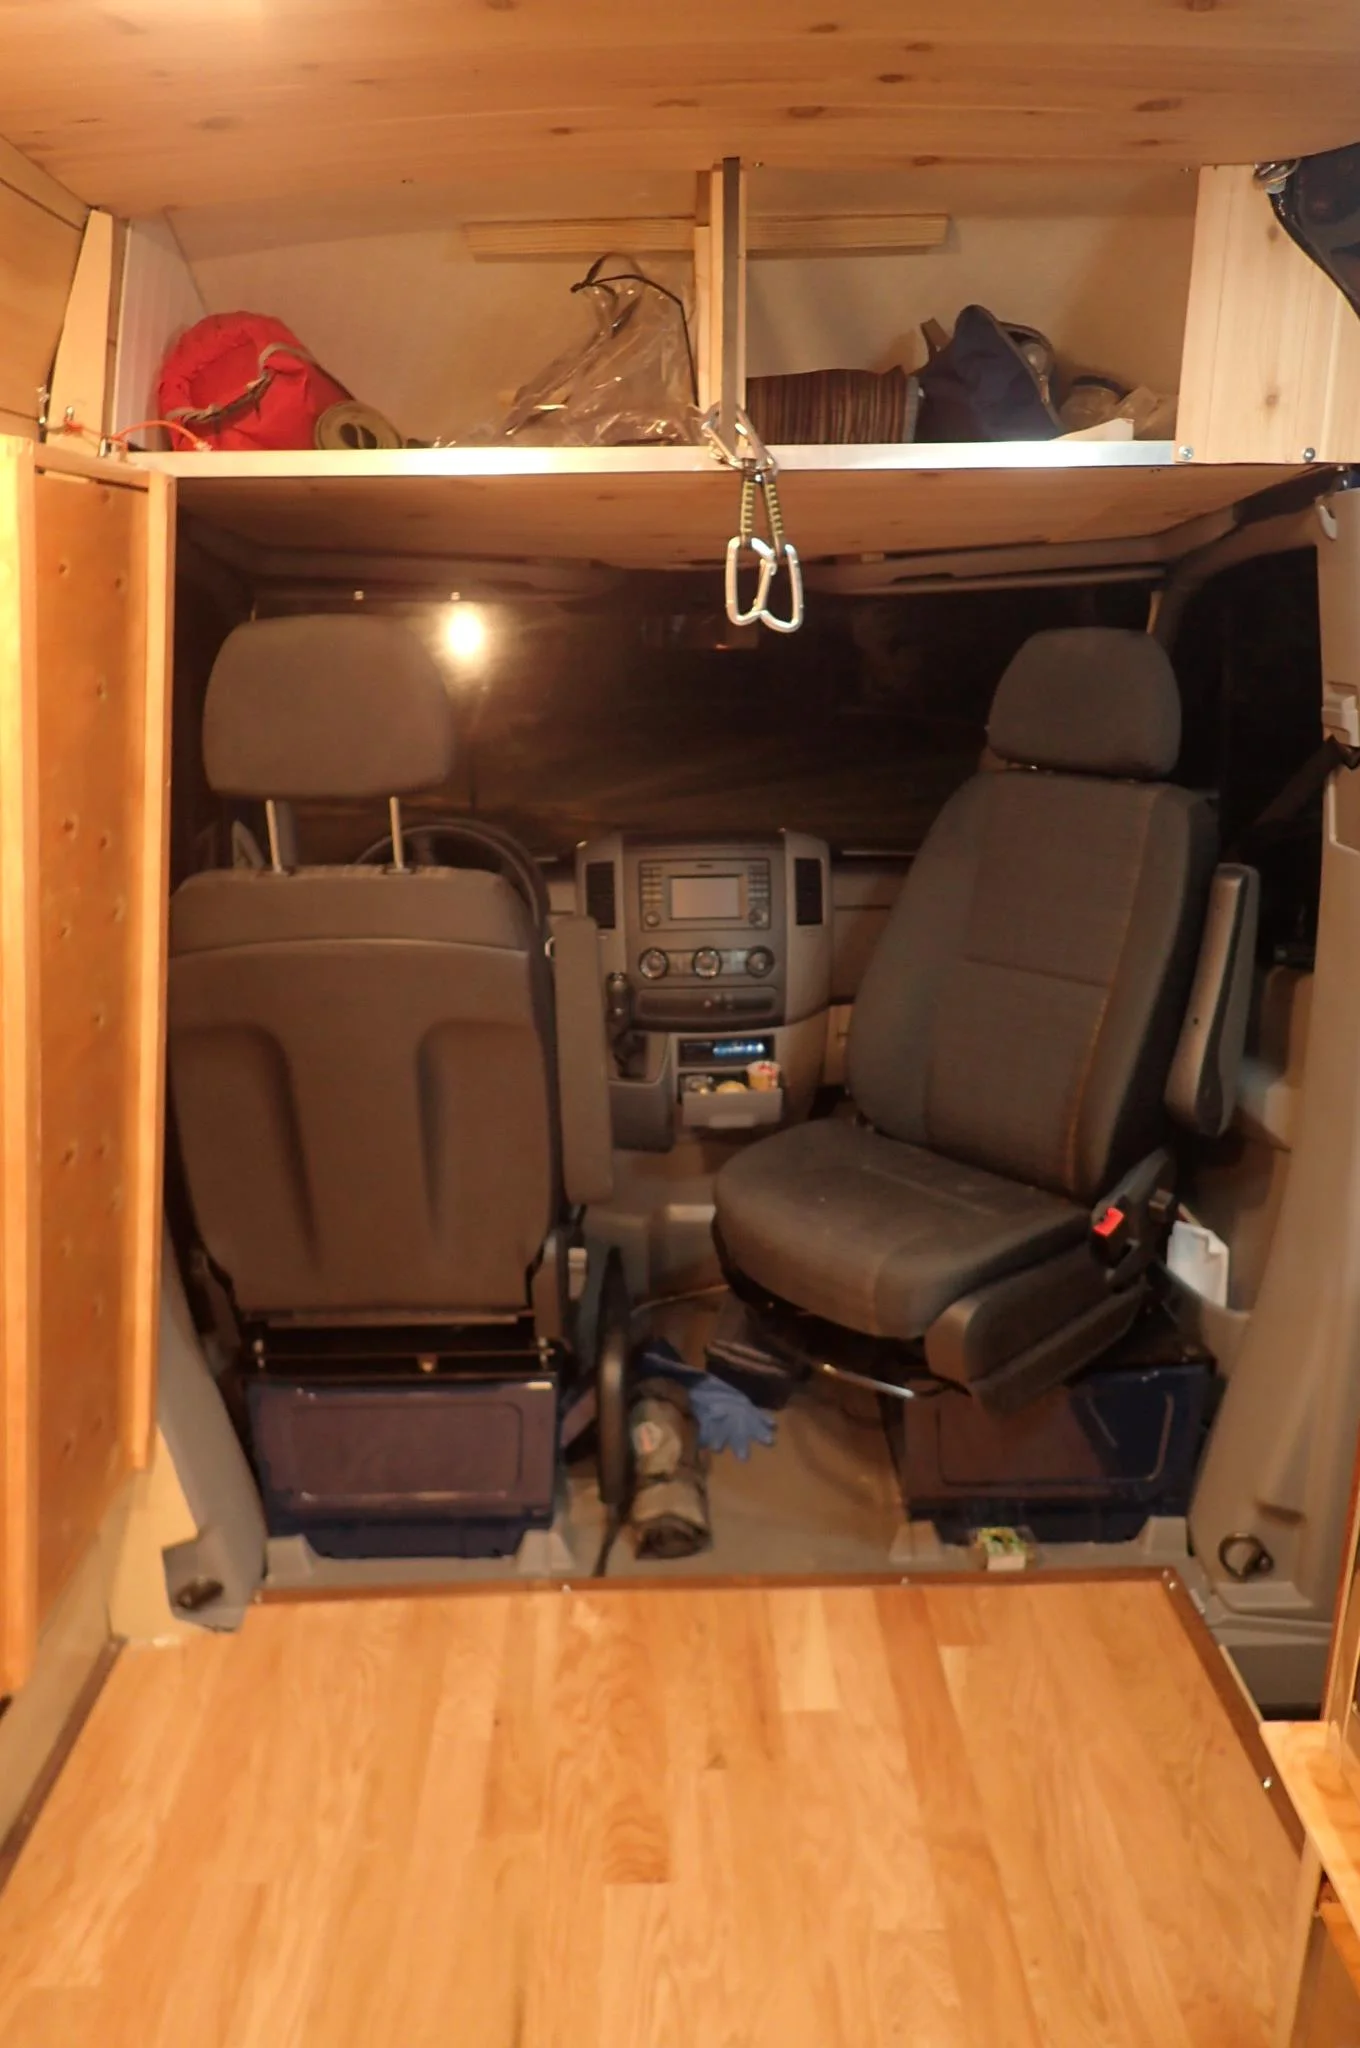
36. Hardwood Flooring
I installed hardwood floors. I like their look, and I got the easy to install click together kind. It’s tricky at first to keep everything tight, but as more and more offset layers build, it gets easier. My floor came out better than expected, and really makes the the van pop. I went around the edge with a likeable trim and screwed it all down into the plywood below.

35. The Stove
The heart of the galley is the stove. I decided to place mine right at the entrance at the sliding door so it is easy to ventilate. When I cook, I turn on the fan, open the door, and enjoy the view. It’s run on propane. I installed my horizontal tank underneath the van on the driver’s side.
That end piece flips up into another small piece of countertop. Nothing on that table my mom gave me was wasted.

34. Two Sinks
Cutting the holes for the sinks was a challenge. I didn’t have a lot of room to the edge to play with and it got a little close for comfort. I put in two sinks, cuz I like to cook, and I like to do dishes. So, one sink to scrub, and one for rinsing.
Running water is great.
I also used the cutouts and turned them into cutting boards!

33. On Demand Water Pump
This was my first water pump - the cutest little pump you’ve ever seen. This pump didn’t last very long. It was too loud, and somehow kept losing pressure causing it to bump on momentarily every 10 seconds. I replaced it with one from a different company, and the problems went away.
I installed this pump under my cabinet next to my two water tanks.

32. The Van's House Runs on Solar Power!
It was an amazing thing to see my lights come on for the first time. It felt so empowering (no pun intended). Using only sunshine, I can run my van. I put cold beer in the running refrigerator, and smiled all day long.
So before I started, I figured out how much power I needed to run everything per day. For me, it was roughly 165 Watts of power. So I chose two 100 Watt Solar Panels, which gave me a bit of inefficiency in my favor, if there was cloudy days.
I can tell you, I have a great system. I’ve never seen it drop below 92 percent, and it holds it’s charge very well.
I highly recommend a good solar system.

31. The Electrical Cabinet
Here are the batteries tied in series, charge controller, switch, fuse box and shunt. This runs the entire house, except for the stove.

30. Solar Panels
It was time to install my panels. The unistrut I used for my roof rack was easy to attach the mounts. I hooked up my cables to the panels in the J block I installed at the high point of the roof. I sealed it off with caulking and made it water proof.
Down in the electrical cabinet, all I had to do was turn on the switch, and start collecting solar rays.

29. The Galley
I’m quite pleased with how the galley turned out. I converted a 3/4 inch oak table my mom gave me when I first moved away into my counter top. I have two fresh water tanks and a small on demand pump that feeds my faucet. I have a propane 2 burner stove with a 9x13 oven. The propane tank lives underneath the van. I have two sinks, and storage underneath the oven for pots and pans. At head level is the main pantry cabinet with food, dishes, and eating hardware.

28. Gray Water Tank
Before I could do my plumbing, I wanted to install my gray water tank. I found a tank online that looked to be the perfect dimensions for where my spare tire used to live. Best of all, I used the support from the spare tire to hold it in place. It really was a perfect fit.
It holds 15 gallons of gray water from my shower and sinks.

27. Finishing Projects - Shoilet
About this time, I started finishing a lot of projects all at once. The shoilet was one of them. I glued on the vinyl, put on trim and caulked the hell out of all the seams. It’s a little tight, but I can take a shower and use the head in my own van. There’s nothing like a hot shower at the end of the day.

26. Refrigerator
I built the base for the refrigerator so I could store books underneath it, making a small cupboard. In a van, one must not waste space. I made sure the bed would fit before I screwed everything down. It fit perfectly, and very soon, I would fire it up and keep my beer cold in my own fridge!

25. Revolving Seats
When I got back to Georgia, I had a pile of new cardboard boxes containing everything I had ordered while I was away. I had a new refrigerator, solar kit, propane tank, coffee grinder, composting toilet, among other things.
The first thing I did was install a swivel mount to me front seats. This allowed them to face the cabin, which offered more seating at dinner time, or chilling out while taking a break from driving.
This was an easy project, and got me going again for everything I had left to do.
But, whatever I did, it wasn’t going to be in Georgia. It would be in South Carolina. I packed up all my stuff and headed east. This time to Billy and Lucy’s way over in Charleston.

24. The Dulcimer
I ate Thanksgiving dinner with Clayton’s family. It was delicious, and I met his Uncle Saul who was an instrument maker. We got to talking, and he wanted to show me his collection. Well, I played a few things, and this mountain dulcimer really jumped out at me. I figured I was here for a reason, and I asked him if he’d sell it to me. Well, he was happy to do it, and now my van had it’s second instrument. The first being my banjo.
The dulcimer and the case are made of gopher wood from Uncle Saul’s backyard. It’s a beautiful piece and sounds amazing.

47. The Easel
I wanted to install a shelf that worked as an easel. I had the perfect spot, and my friend Steve had the perfect board. It was an old piece of redwood from an old water tower in South Carolina. He cut it, and I installed it.
It works perfectly. It keeps the piece in place while traveling and gives me a chance to review my progress while taking a break.

22. The Murphy Bed
With the head more or less in, it was time to install the wall support for the bed. I beefed up the strength of the material I’d be screwing to, by adding some 1/8” steel where the hinges would be secured to. Then I set about building the frame the mattress would lie on.
I would make the bed as big as I could, and with my efficient planning, I was able to make a bed almost full size. It was just a few inches smaller.
I wasn’t sure what I was going to use for a mattress. Clayton, Alicia and I went to a giant car swap meet, and I found a vendor selling two inch closed cell foam mattresses. I bought two, figuring I’d like double thickness. Problem solved! This happened a lot. I’d have a problem to solve, and the answer would present itself in timely fashion. So, I built my own mattress too. Who else do you know does that?
With my murphy bed well designed and built, I returned my thoughts to the overhead panels.
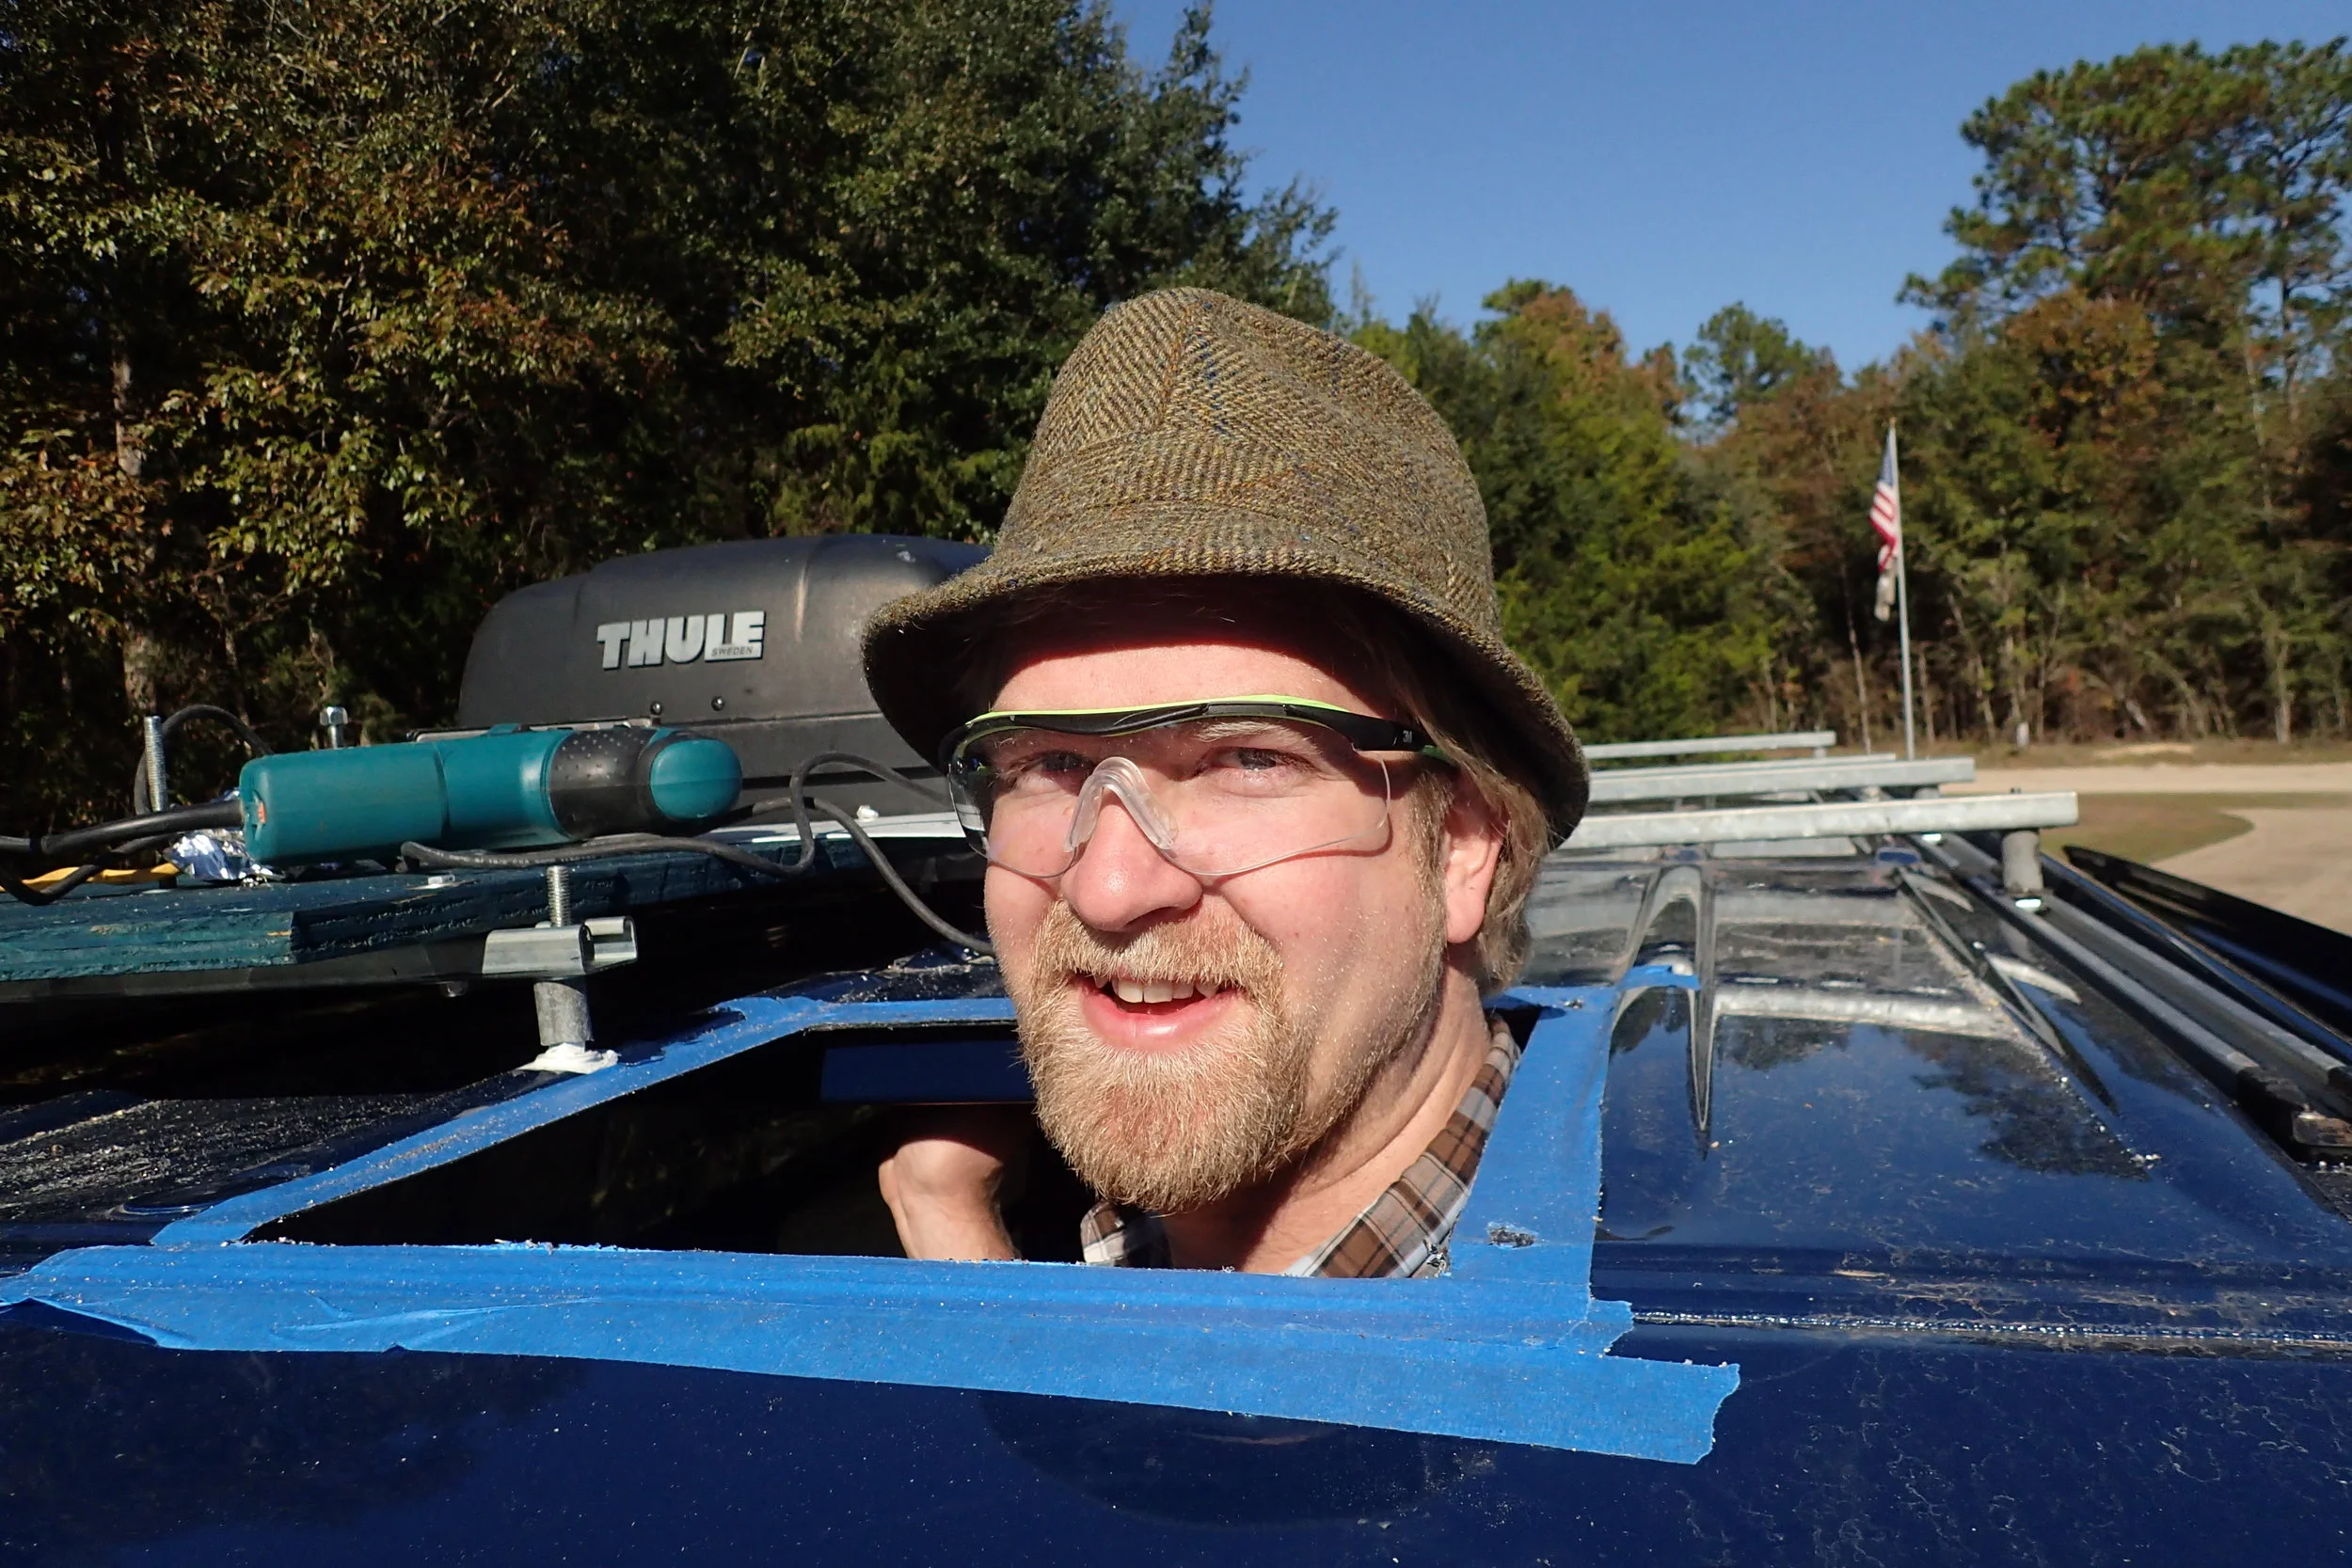
18. Overhead Fan
After lots of consideration and measuring, I realized there was only one place my overhead fan would fit. That made it easy. “The fan goes there.” It wasn’t exactly where I was planning to put it, but I realized my first place was right in the middle of a support beam, and I didn’t want to cut that, so I had to move it.
Once again, I was about to chop a hole in my van, this time in the ceiling. I wanted to make damn sure it didn’t leak, so I bought several tubes of sealant and a couple rolls of Betel tape, which is used by electricians to make sure their connections are water tight. My old boss called it “Monkey Snot.” Which is an apt name for sure, but really hard to find in Home Depot if that’s what you think it's called.
I put on my best hat, and got to it, tracing out my cutting line and protecting the paint with tape. I drilled my pilot holes and went for it. The installation went smooth, and now I had a fan!

23. The Overhead and Lights
I used cedar panels for the overhead. The look great. They smell great. I ran them from side to side screwing them into the furring strips I had already attached to my stiffeners. It was a relatively easy job, but I had to be careful my cuts were good, as this was finished product.
You can see the clothing shelf over the seat in this photo as well.
With this job complete, it was time to head back to work for another 6 week stint at sea. This was a good thing, as my finances were in sharp decline. This also gave me a break, ironically, and allowed me to do a little more research on the final pieces of the puzzle.
21. More Paneling, Wiring
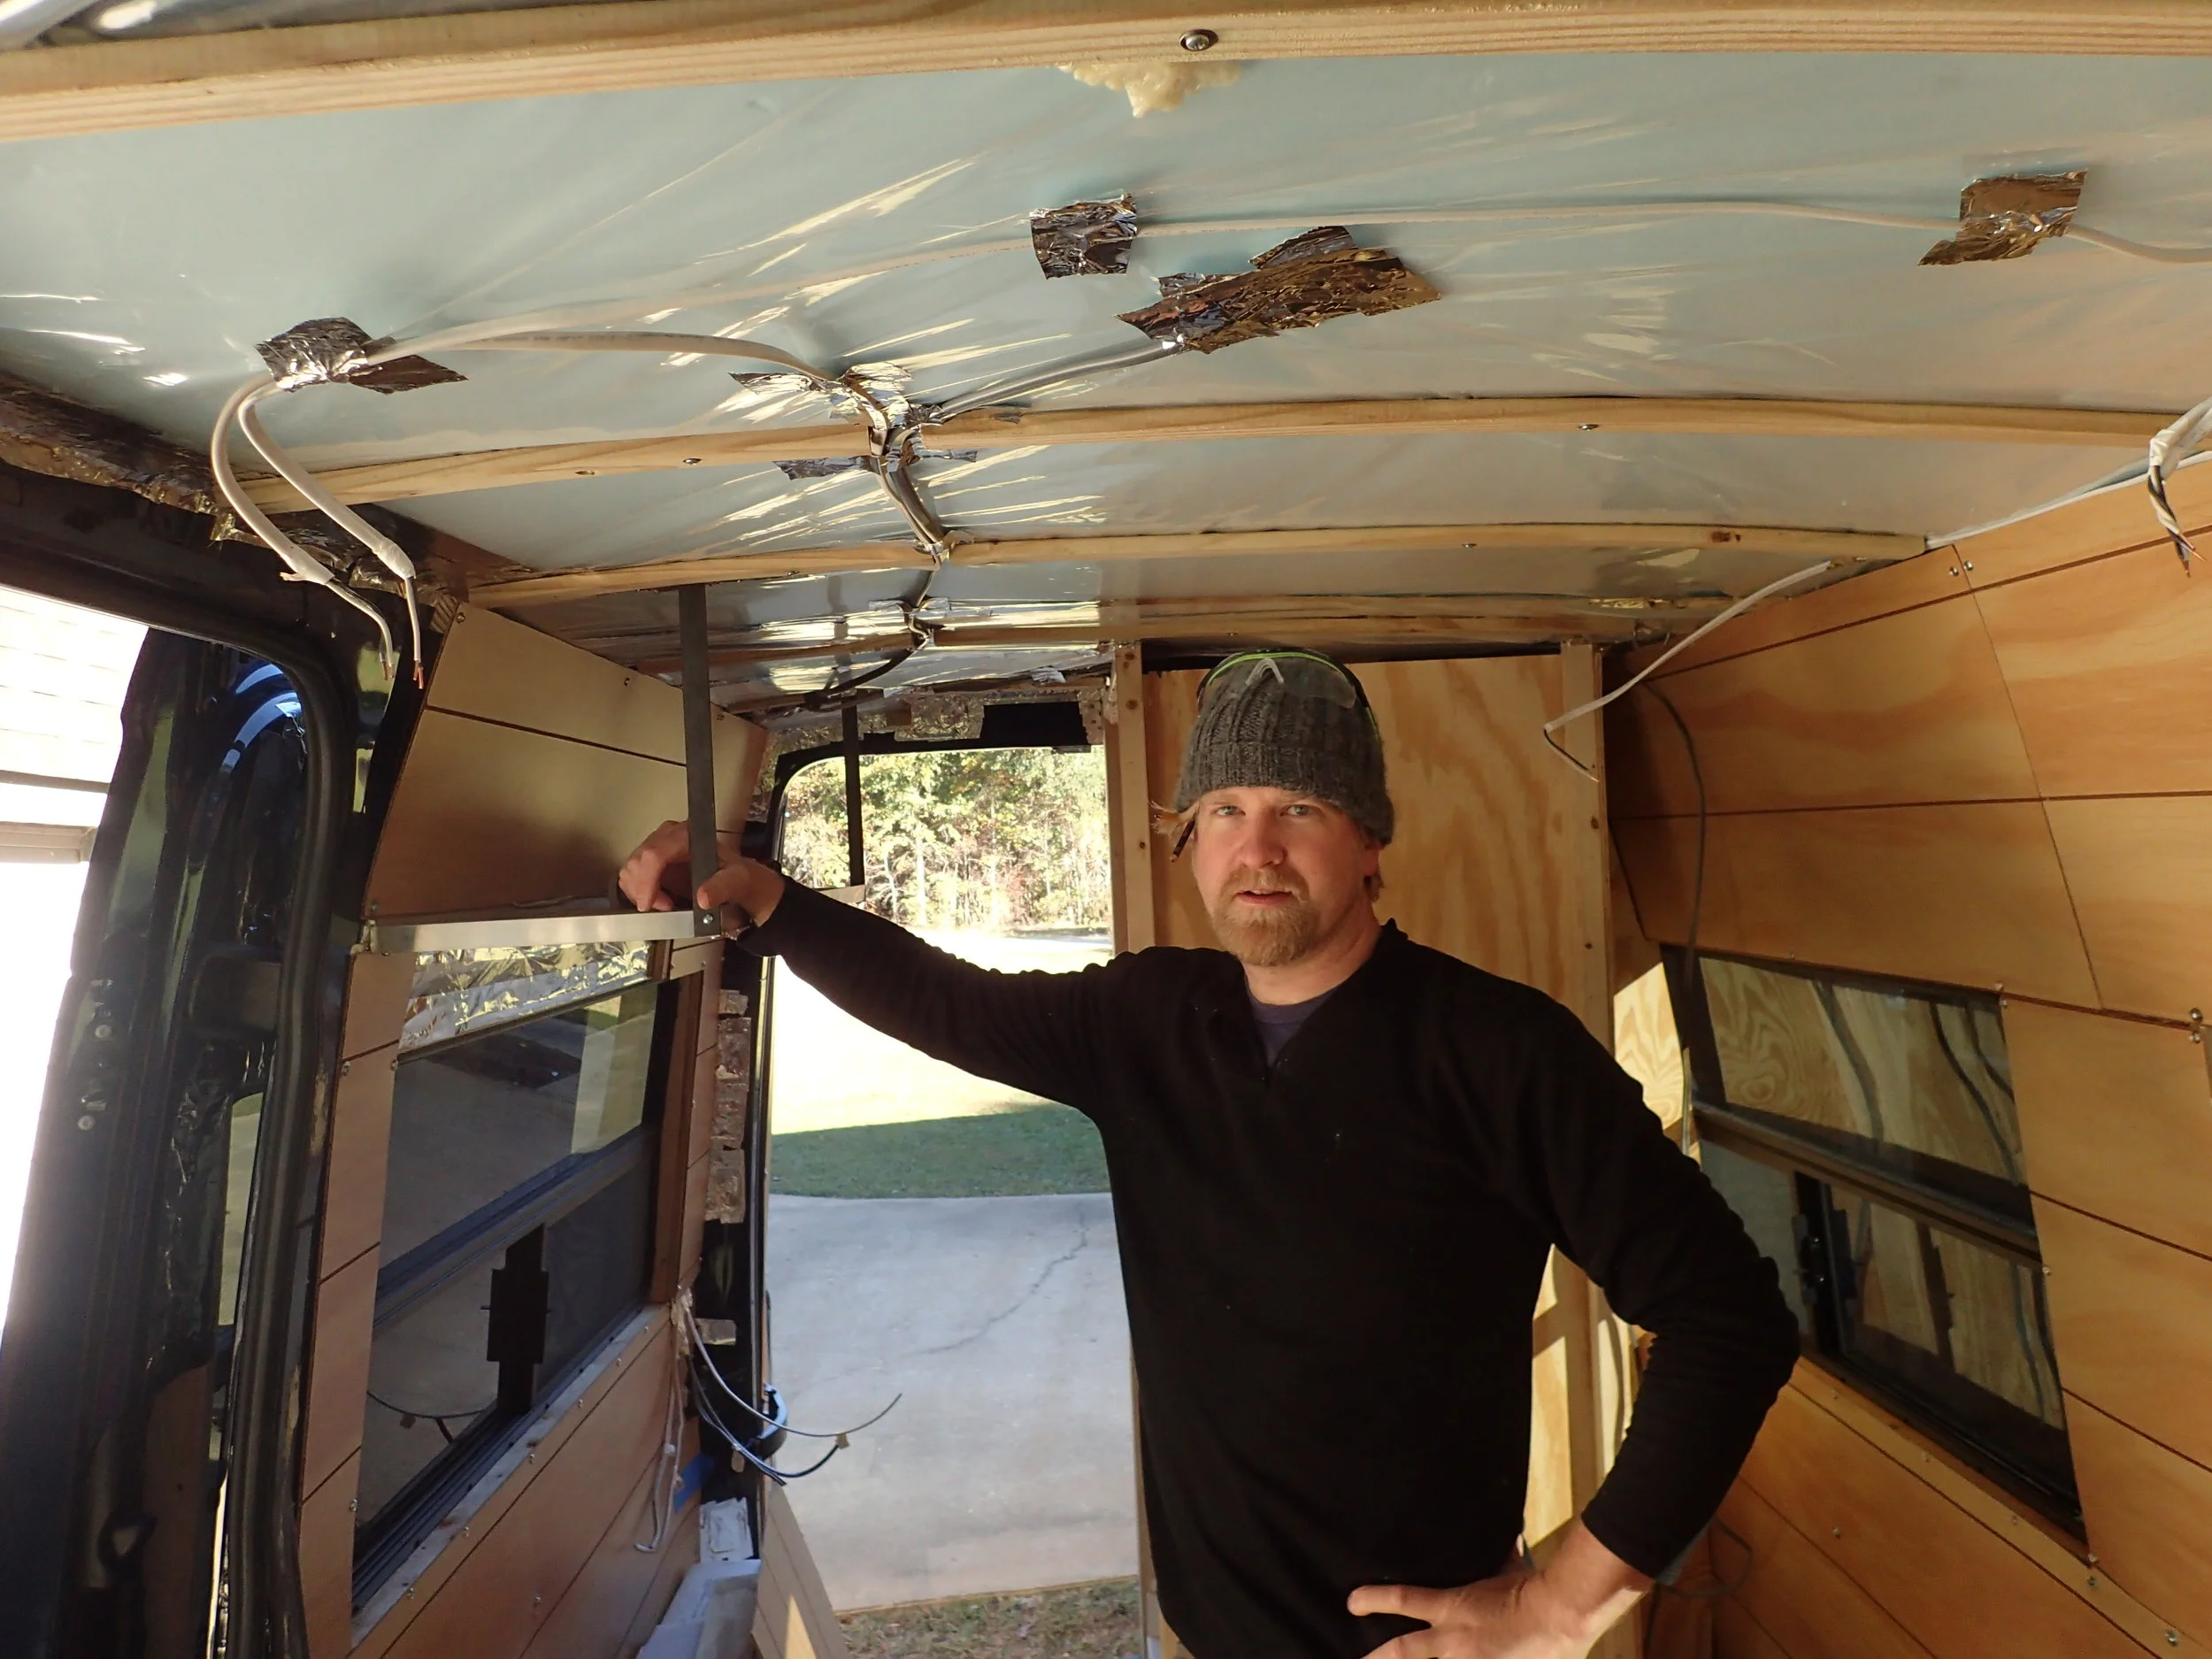
More panels went up. The shoilet was in place. I ran my cables for the refrigerator, lights, fan, toilet, and solar panel feed cable. I put up thin boards to my stiffeners so I had something to screw into when I installed the rest of my panels. I framed out the windows so I had something to screw to, when I installed my curtains and paneling. The van was coming along nicely, and I dove deep into the mantra of the work. I lived simply. I ate. I slept. I built the van.

20. Walls for the Shoilet
The walls went up to my frames. The shoilet really began to look like something. Notice the window to the side, I’ve got ventilation. Also, notice the fan and the tire mounted up in the ceiling. This is a good place for a fan, as it pulls out all the moisture while you are showering. I had to put the tire up on the roof, because I needed the space on the underside for my gray water tank.

19. Framing In the Shoilet
I wasn’t sure how I was going to secure the 2x2’s I used to frame the shoilet to the deck or ceiling. So I experimented a lot with placement, levelness, and usefulness for a location of the frames. Once satisfied, I began to secure the boards to the ceiling and deck. I was glad of the plywood base, as it was very useful to secure the aluminum angle pieces down. Then using the flat side I secured my 2x2’s to that. Same thing on the overhead side.

17. Side Panels
With the insulation and vapor barrier in, I could start putting in side panels which would be behind the galley and shoilet. These would never be seen, and so I didn’t have to think to hard about aesthetics, they just had to be done before I could start framing. If i had an electrical wiring run that went through this space, I ran the cables before I put up the panel.
At first I used some cheap particle board crap panels from Home Depot. But they were flimsy, hard to work with, and I really didn’t like them. Working on a van is like working on a boat. Nothing is square or level, and there are multiple compound curves for each piece. It took a long time, and many cuts to get the panels to fit right. Once they did, I had a template to use for when I cut and installed the cedar panels later in the spring. For now, these would do.

16. The Georgia Sessions
This was an idyllic time of the build. I was hanging out at my buddy Clayton’s house. I’d get up in the morning before dawn and have a coffee on the back deck. I’d watch the day slowly get brighter and warmer with the sun.
I’d have another cup of coffee with Clayton, and then I’d get to work. Most days I had three projects going at once. The Ceiling Fan, wiring, framing for the shoilet, and more side panels all happened kind of at the same time.
I’d take a break for lunch sometimes, sometimes not. I’d run around with the dogs when I needed to stretch some. And I’d quit working about sunset, and crack a beer. I’d enjoy that beer either scheming about the next day, or admiring my work of the current day.
And I worked. I took one day off on Thanksgiving, but other than that, I was in full on work mode.

15. Road Trip To Georgia
It took me about a week to get down to Georgia. I like driving back roads, especially ones I’ve never been on before. I meandered. I went to see southern Illinois. I drove through Kentucky, lots of Tennessee and finally made it to Georgia.

13. On Shelving, Hammocks, and Insulation
I had decisions to make. Where would I put up my shelf for my galley? How big would it be? At this time I also put a big shelf over the front seats to hold all of my clothing. It has two sides to it, one for myself and one for my guest. I put in my hammock supports in, big D rings that connect to the support beams. This was one of the best ideas I had, sitting in a hammock every night is a great option to have.
After my shelving supports were in, it was time to insulate.
Insulating probably took more time than anything else. The big spaces were easy enough. I put blue board foam insulation in the overhead gaps between stiffeners. I put denim R-6 in every spot I could cram it in to. There are a lot of spaces to fill in the back of this van. I used foam in a can for the places I couldn’t get my fingers into. That shit gets everywhere. It sticks to everything, and it never really stops growing.
12. Shower Pan and Layout
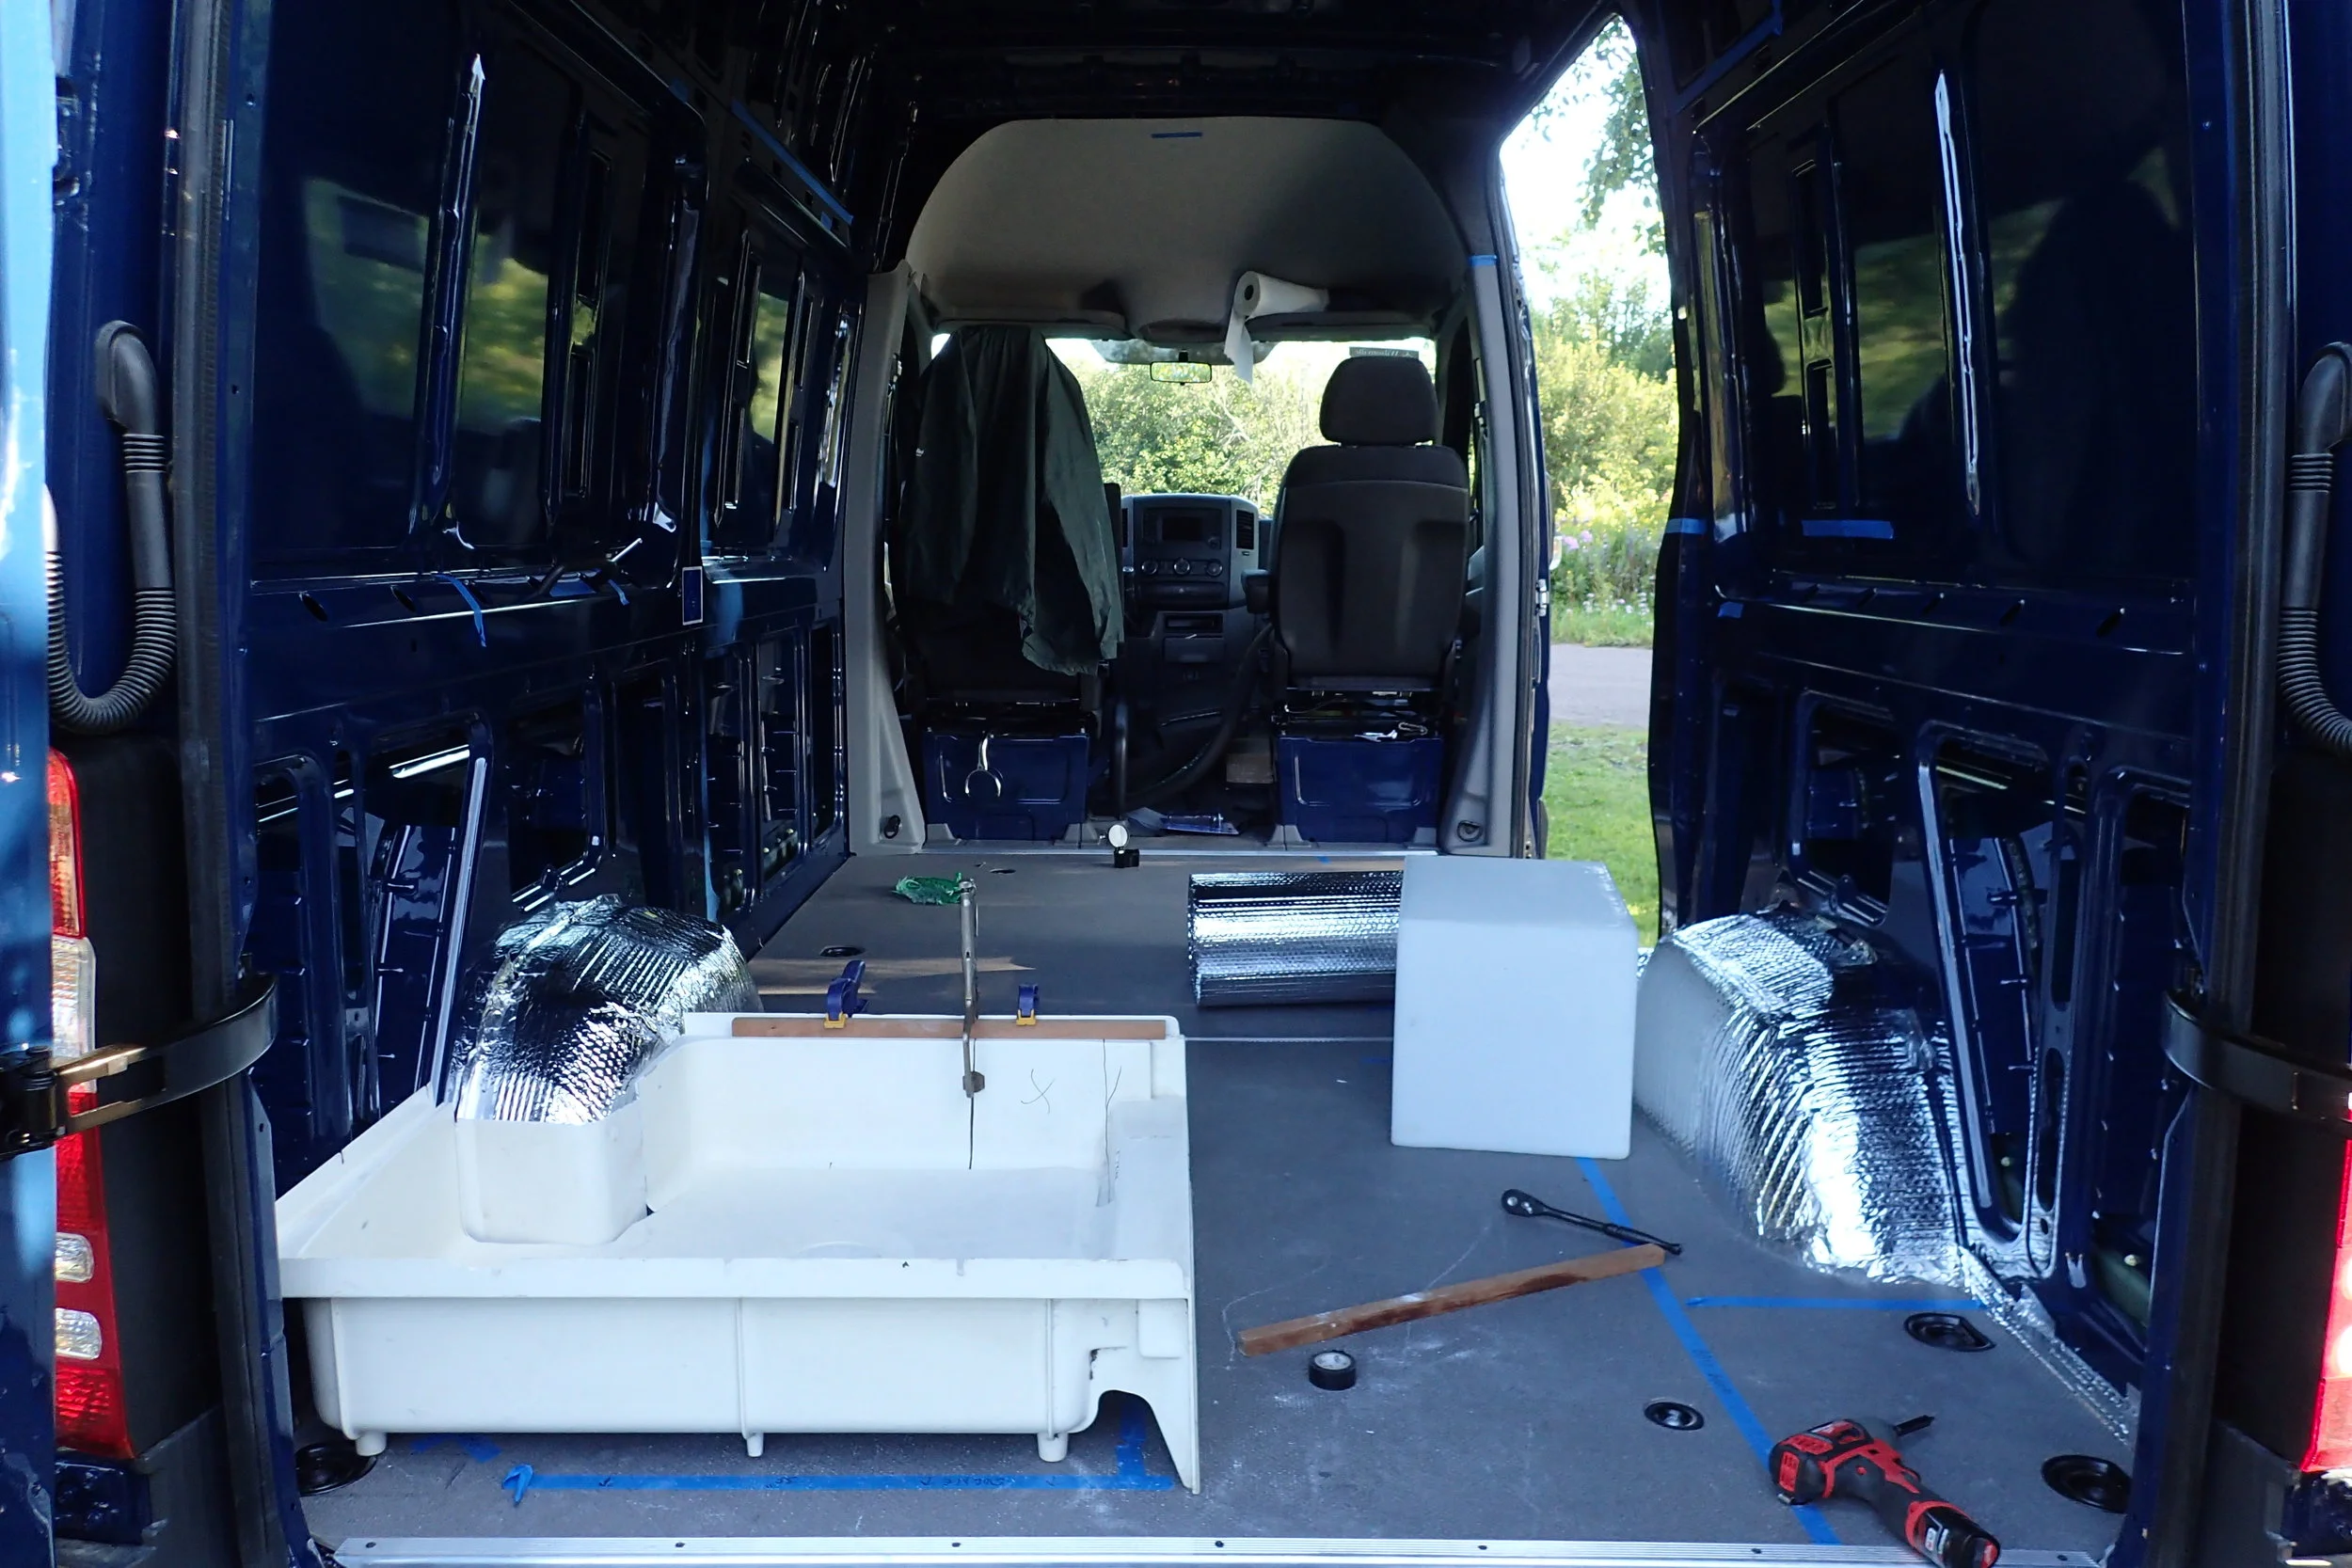
With the Windows in, I turned my attention to basic layout of the deck. Where would the shower go? I had to figure this out before anything else. I didn’t even have a shower pan. The day I was looking at this, one of my brother’s drinking buddies showed up and said he had an old fiberglass shower pan that I could have. He went home and grabbed it, brought it back, and it looked ideal.
The trouble was, I was going to have to cut it, modify it, and bondo the whole thing back together so it would fit around my wheel well. This was no easy task. It took a lot of careful cutting and bondo work to get it right.
However, with that pan in place, it made the rest of the van’s layout easy to figure out.

11. Windows Part 4 Finished Product
They look great. They work great. The window project was a success, and with them in place, I could start insulating the walls and getting a vapor barrier in place.
10. Windows - Part 3
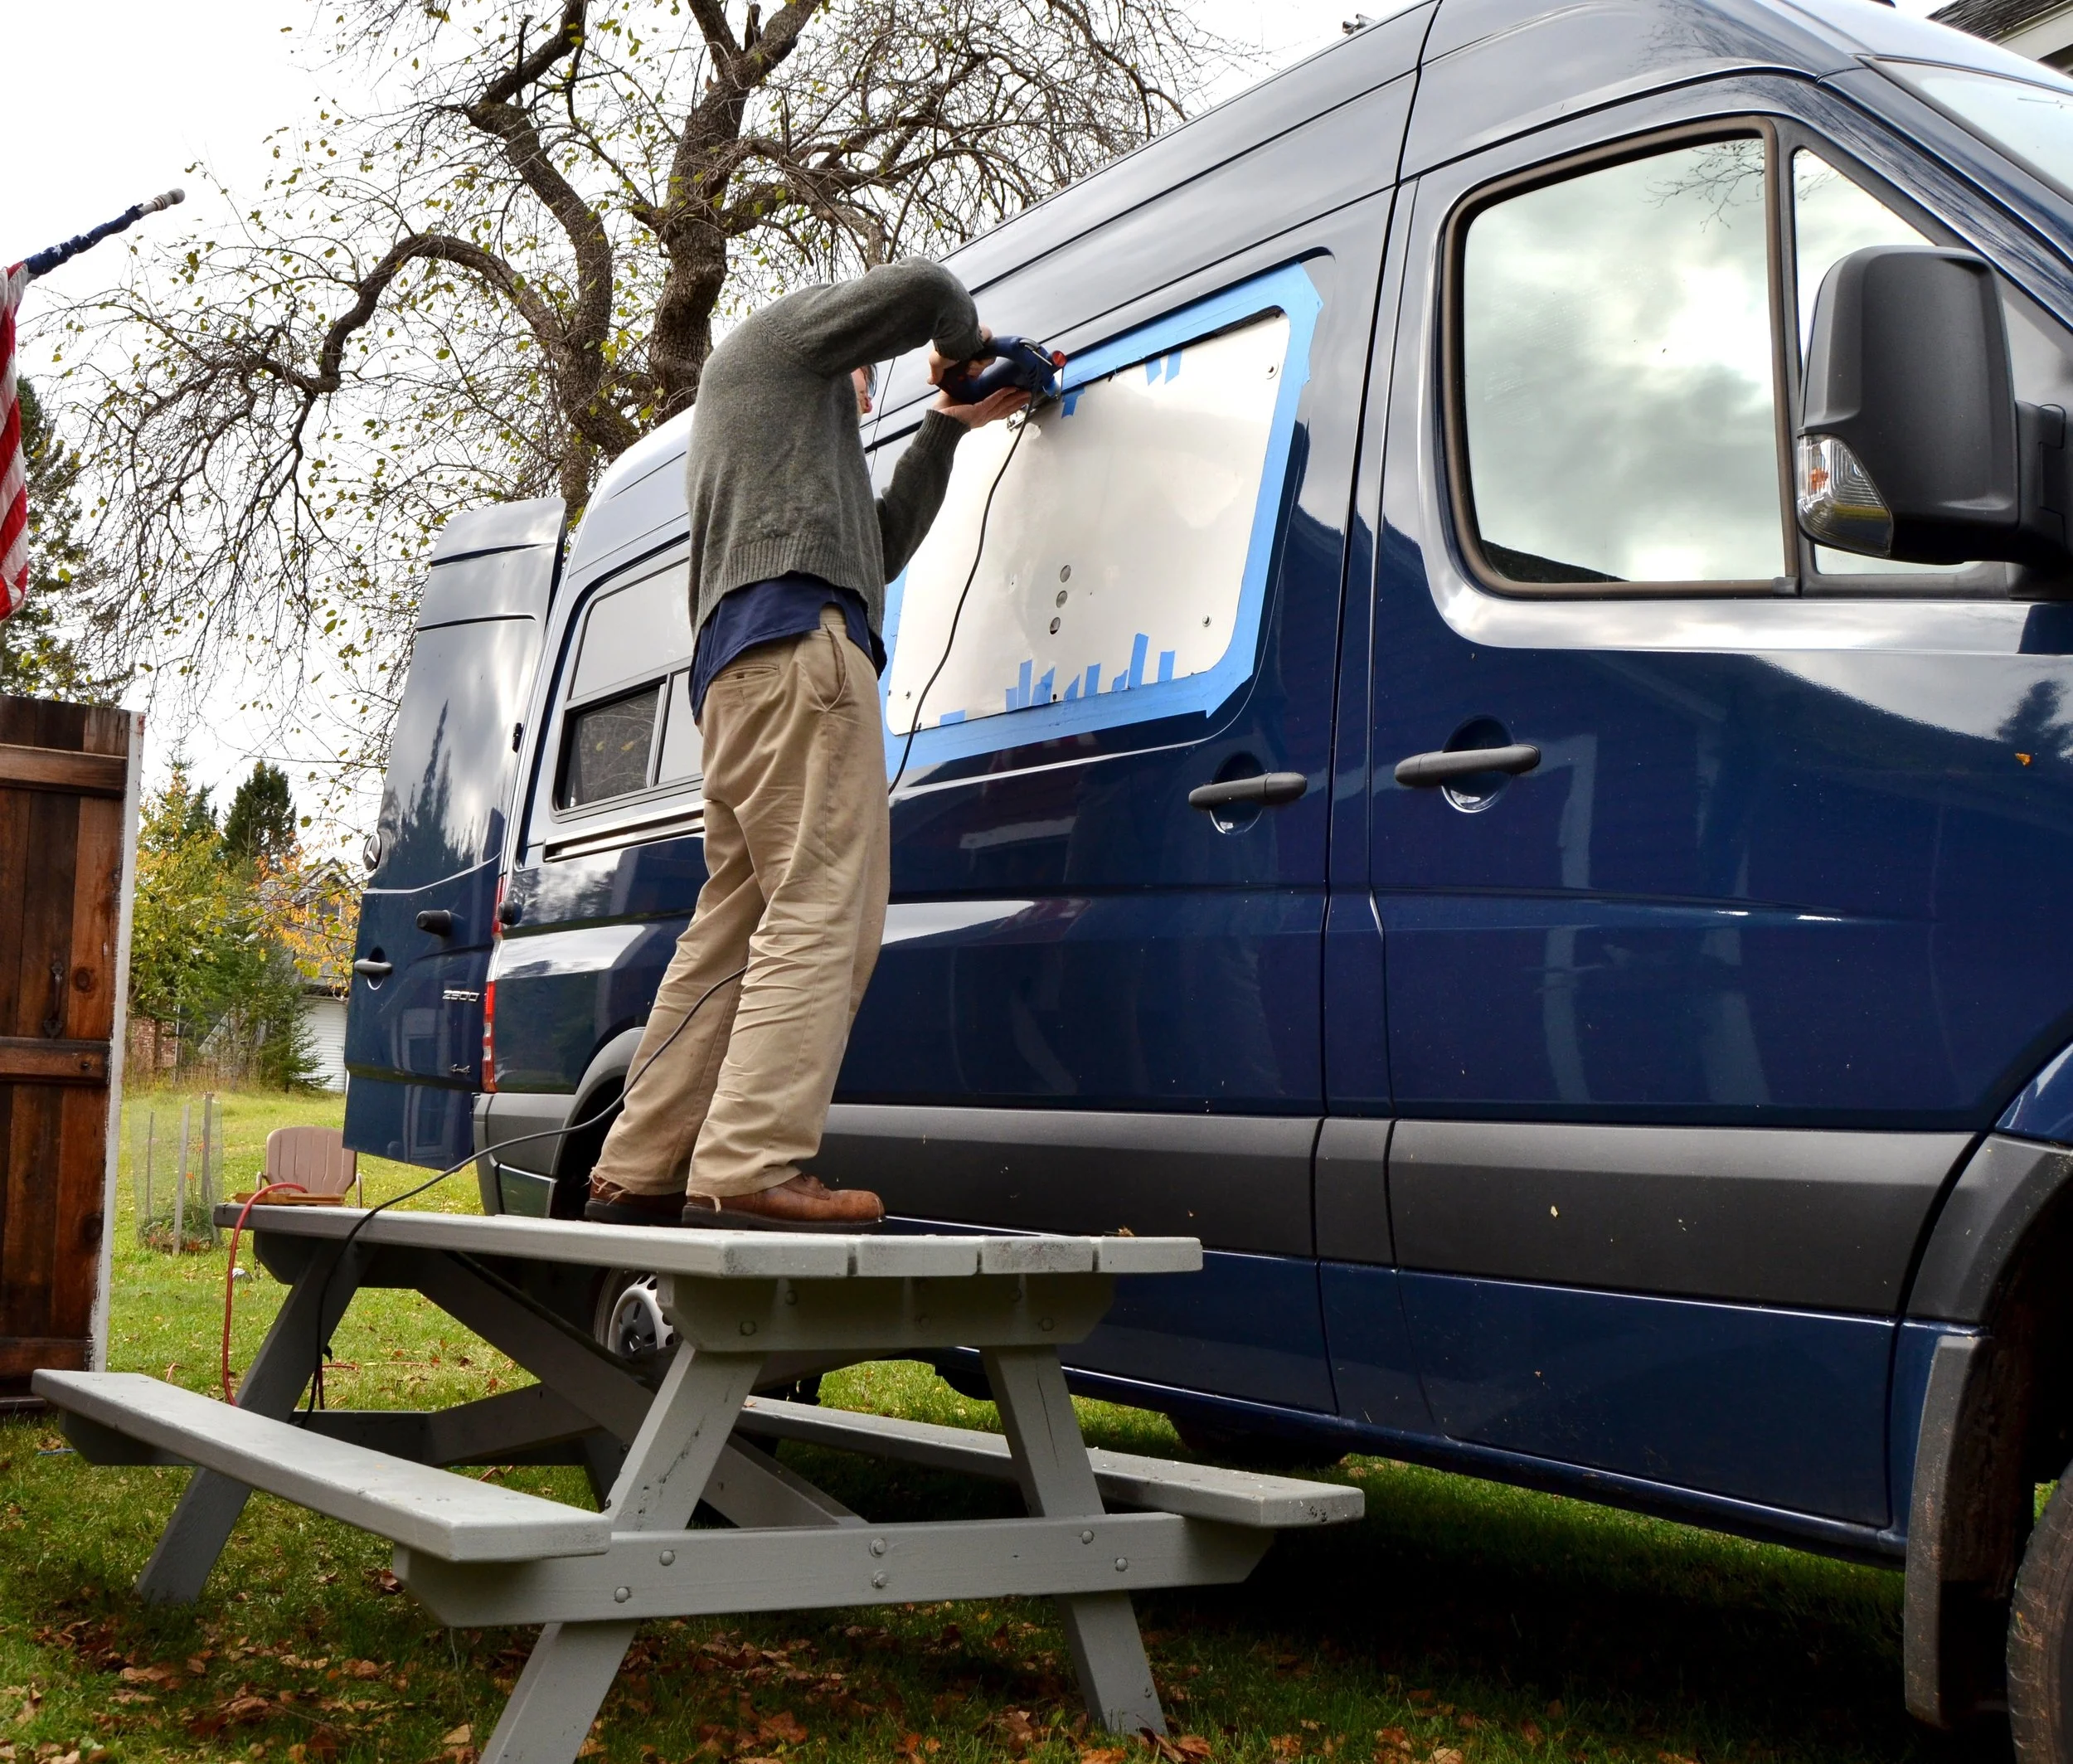
The next day, I inspected my window for leaks. No water. No leaks! The storm had passed, the day was calm.
Using the template technique I had used on the first window, I had the rest of them installed by 2 pm.

9. Windows -Part 2
The morning I planned to start cutting holes in for the windows, a giant squall blew in off of Lake Superior. I didn’t care, I was determined to put in a window. I had just drilled my first pilot hole, when “BLINK” the power went out.
I spent four hours doing everything I could to prepare the windows for the job. I was about to call it a day, and crack a beer when “BLINK” the power came back on.
Should I go for it? It was getting late in the afternoon. Sunset was not far away.
To hell with it! I wanted to make progress. I put in my pilot holes, and started cutting. The storm didn’t abate. It was still raining and howling, and growing dark.
With trepidation, I yelled for my brother to give me a hand. The window fit perfectly into my cut. While he held it in place, I secured it. The system worked!
I went to bed knowing if I could put in these windows, I could do anything.

8. On Windows, Part 1
I planned on installing my own windows. This was one of the biggest and scariest projects of the whole build. After all, I was contemplating cutting four giant holes into the side of my brand new 50,000 dollar van. It made me pucker just thinking about it.
When I returned home, my windows were waiting for me. I unpacked them, inspected them, and tried to come up with a good game plan for installation.
My brother, a building genius, offered the wise advice of making an exact template of the window out of some strong, yet bendable material. First I’d check the position on the inside of the van. I taped it where I wanted it. Then I drilled holes through the template and the van wall. This allowed me to transfer the template to the outside of the van, making sure that the template was oriented exactly as it was on the inside. After bolting it down and protecting the paint with blue tape, I could cut out the hole for the window with a jig saw following the edge of the template.
Good in theory, but would it work?
7. Reflectix - Wasting Time
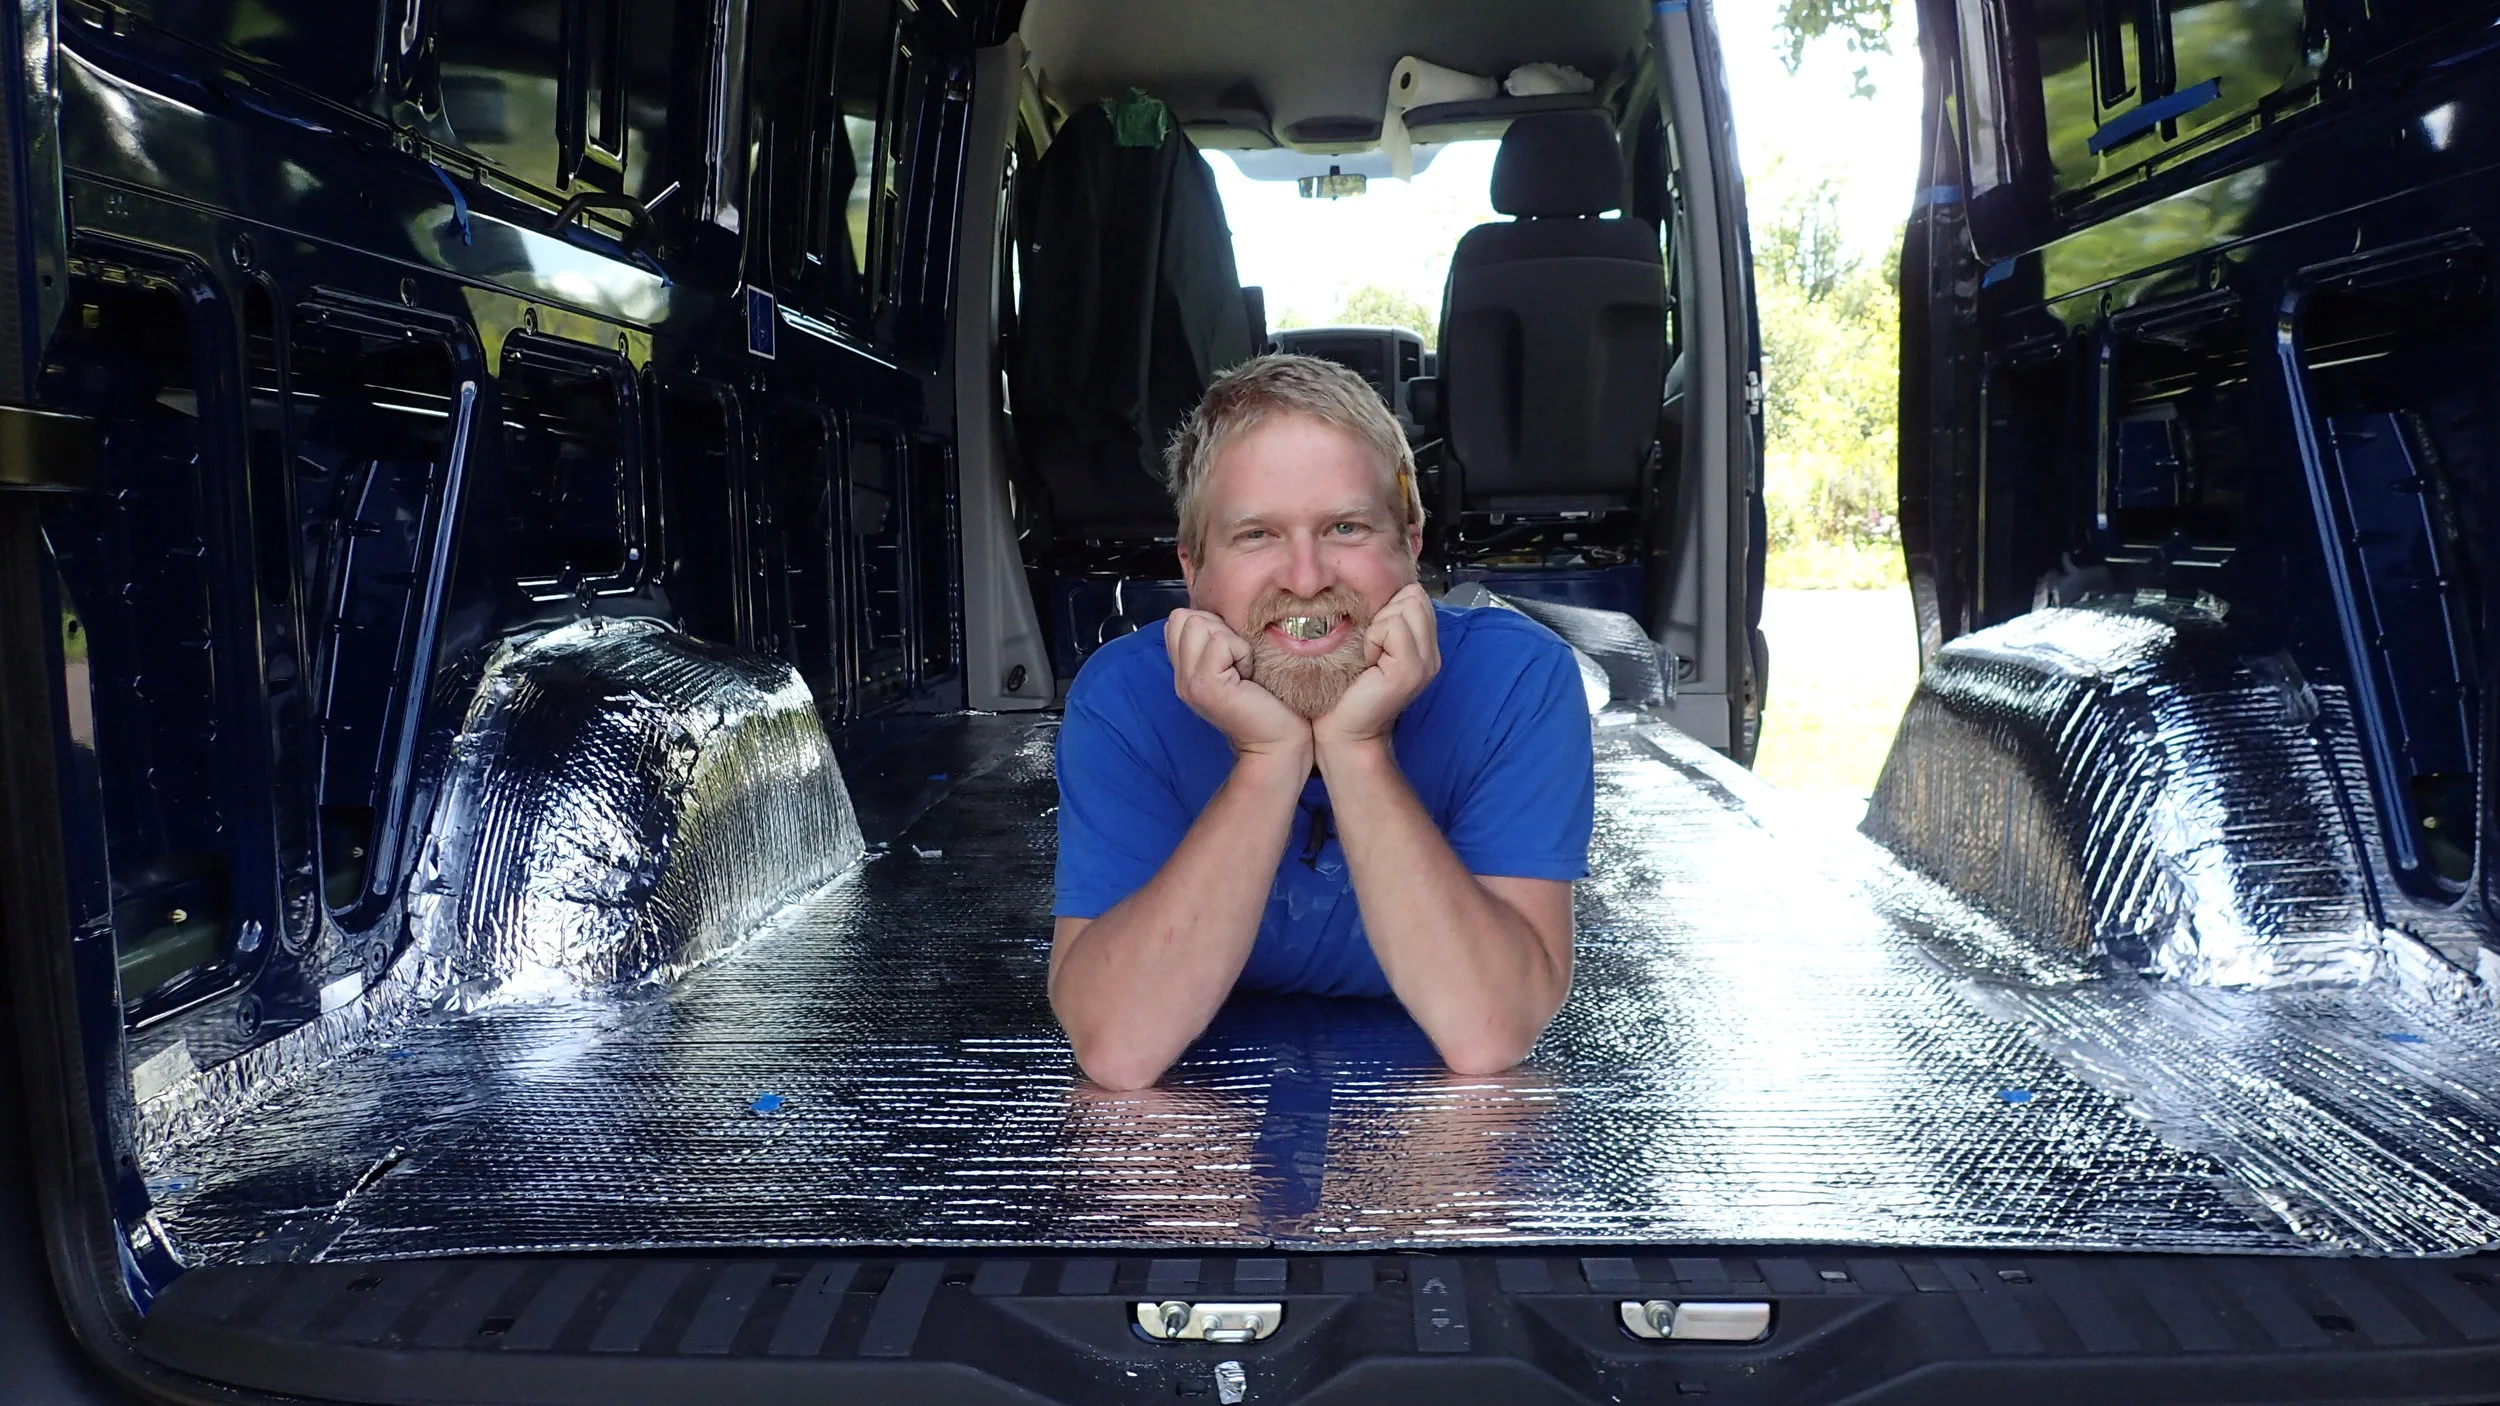
I put in a lot of Reflectix on the outside skin of the floor and around the wheel wells. It wasn’t really necessary, and really won’t do much for insulation of the van. It has no R value. I did it because other people did it, and at the time it made sense.
This is a perfect time to point out that there are a lot of bad builders out there. Vanning is popular, and a lot of people are building custom rigs. Not all of them know what they are doing. Beware!
Mostly, I just built it the way I wanted it and solved problems as they arose. I didn’t look at Youtube videos for ideas, I stayed away from the “know-it-alls.” I thoroughly enjoyed every day I worked on the van.
No matter. It was time to go back to work. While off shift, I spent my off time ordering and shipping the insides of my van to my brother, one piece at a time.

7. The Roof Rack
Now that I could access my roof, I grabbed my tape measure and began to plan out the roof space. I wanted it to hold two solar panels, a Thule car top carrier, a fan, and a spare tire. It was tight, but according to my measurements, everything would fit.
When I ordered my van, I had them install the tracking for a roof rack. That was easier than doing it myself, and it didn’t cost that much. Money well spent.
I built the rest of it out of Unistrut and stainless hardware. It cost about $70.00.

6. The Ladder
I have a very tall van. Currently, It’s about 11 feet high. For the first time in my life, I have to pay attention to overhead signs indicating the height of bridges and overpasses.
It was late summer by the time I got back to Michigan where I would begin my build. I didn’t have a lot of time before I had to return to work. While I was still out west, I ordered a ladder and had it sent to Michigan, so it would be there when I arrived.
The first project was installing it on the back door. My brother helped me on this project, but I knew I couldn’t rely on his expertise. I was going to do it alone, and do it my way.
The ladder is a good one, and it gave me access to my roof, for which I had a lot of ideas and plans.

5. First Things First
While going to the hardware store on my first run of seemingly hundreds, I found this license plate. I’m from the UP. It’s an obscure place to come from, and I’m proud of it. Ya gotta represent!

4. The Grand Design
Designing the layout of the van was a lot of fun - so many possibilities and problems to solve! I designed it myself (of course). I wanted an open floor plan. This meant I had to design a working murphy bed (more on this later). I made a list with dimensions of the pieces I planned to install.
My dimensions of the house were roughly 13 feet by 5 and 1/2 feet. I set to work seeing how it could all be pieced together.
Using my tape measure and blue tape, I laid it all out on the floor and ceilings to see if it would all fit. Seemingly, it would, so knowing I’d have to change some of it on the fly, I set forth with a tentative plan.

3. Thinking Ahead: Solar Panels and Batteries
I decided to start my road trip back to Michigan by stopping in Springfield at AM Solar. These guys are professional Solar experts specializing in RV and van setups. I wanted to pick their brain about panels, batteries and accessories. I also wanted to buy some batteries. Batteries are heavy. Shipping them costs a lot, so I figured I’d just pick mine up and deliver them myself. I purchased two Lifeline 6 volt AGM batteries.
As it turned out, AM Solar had a few solar panels with ever so slight mars on them for a discounted price. I bought them, knowing I wouldn’t use them for awhile. But again, it saved the cost of shipping them. And those mars? No issue at all. Of all the systems of my van, I’m most happy with and proud of my solar electrical system.
More about solar later.
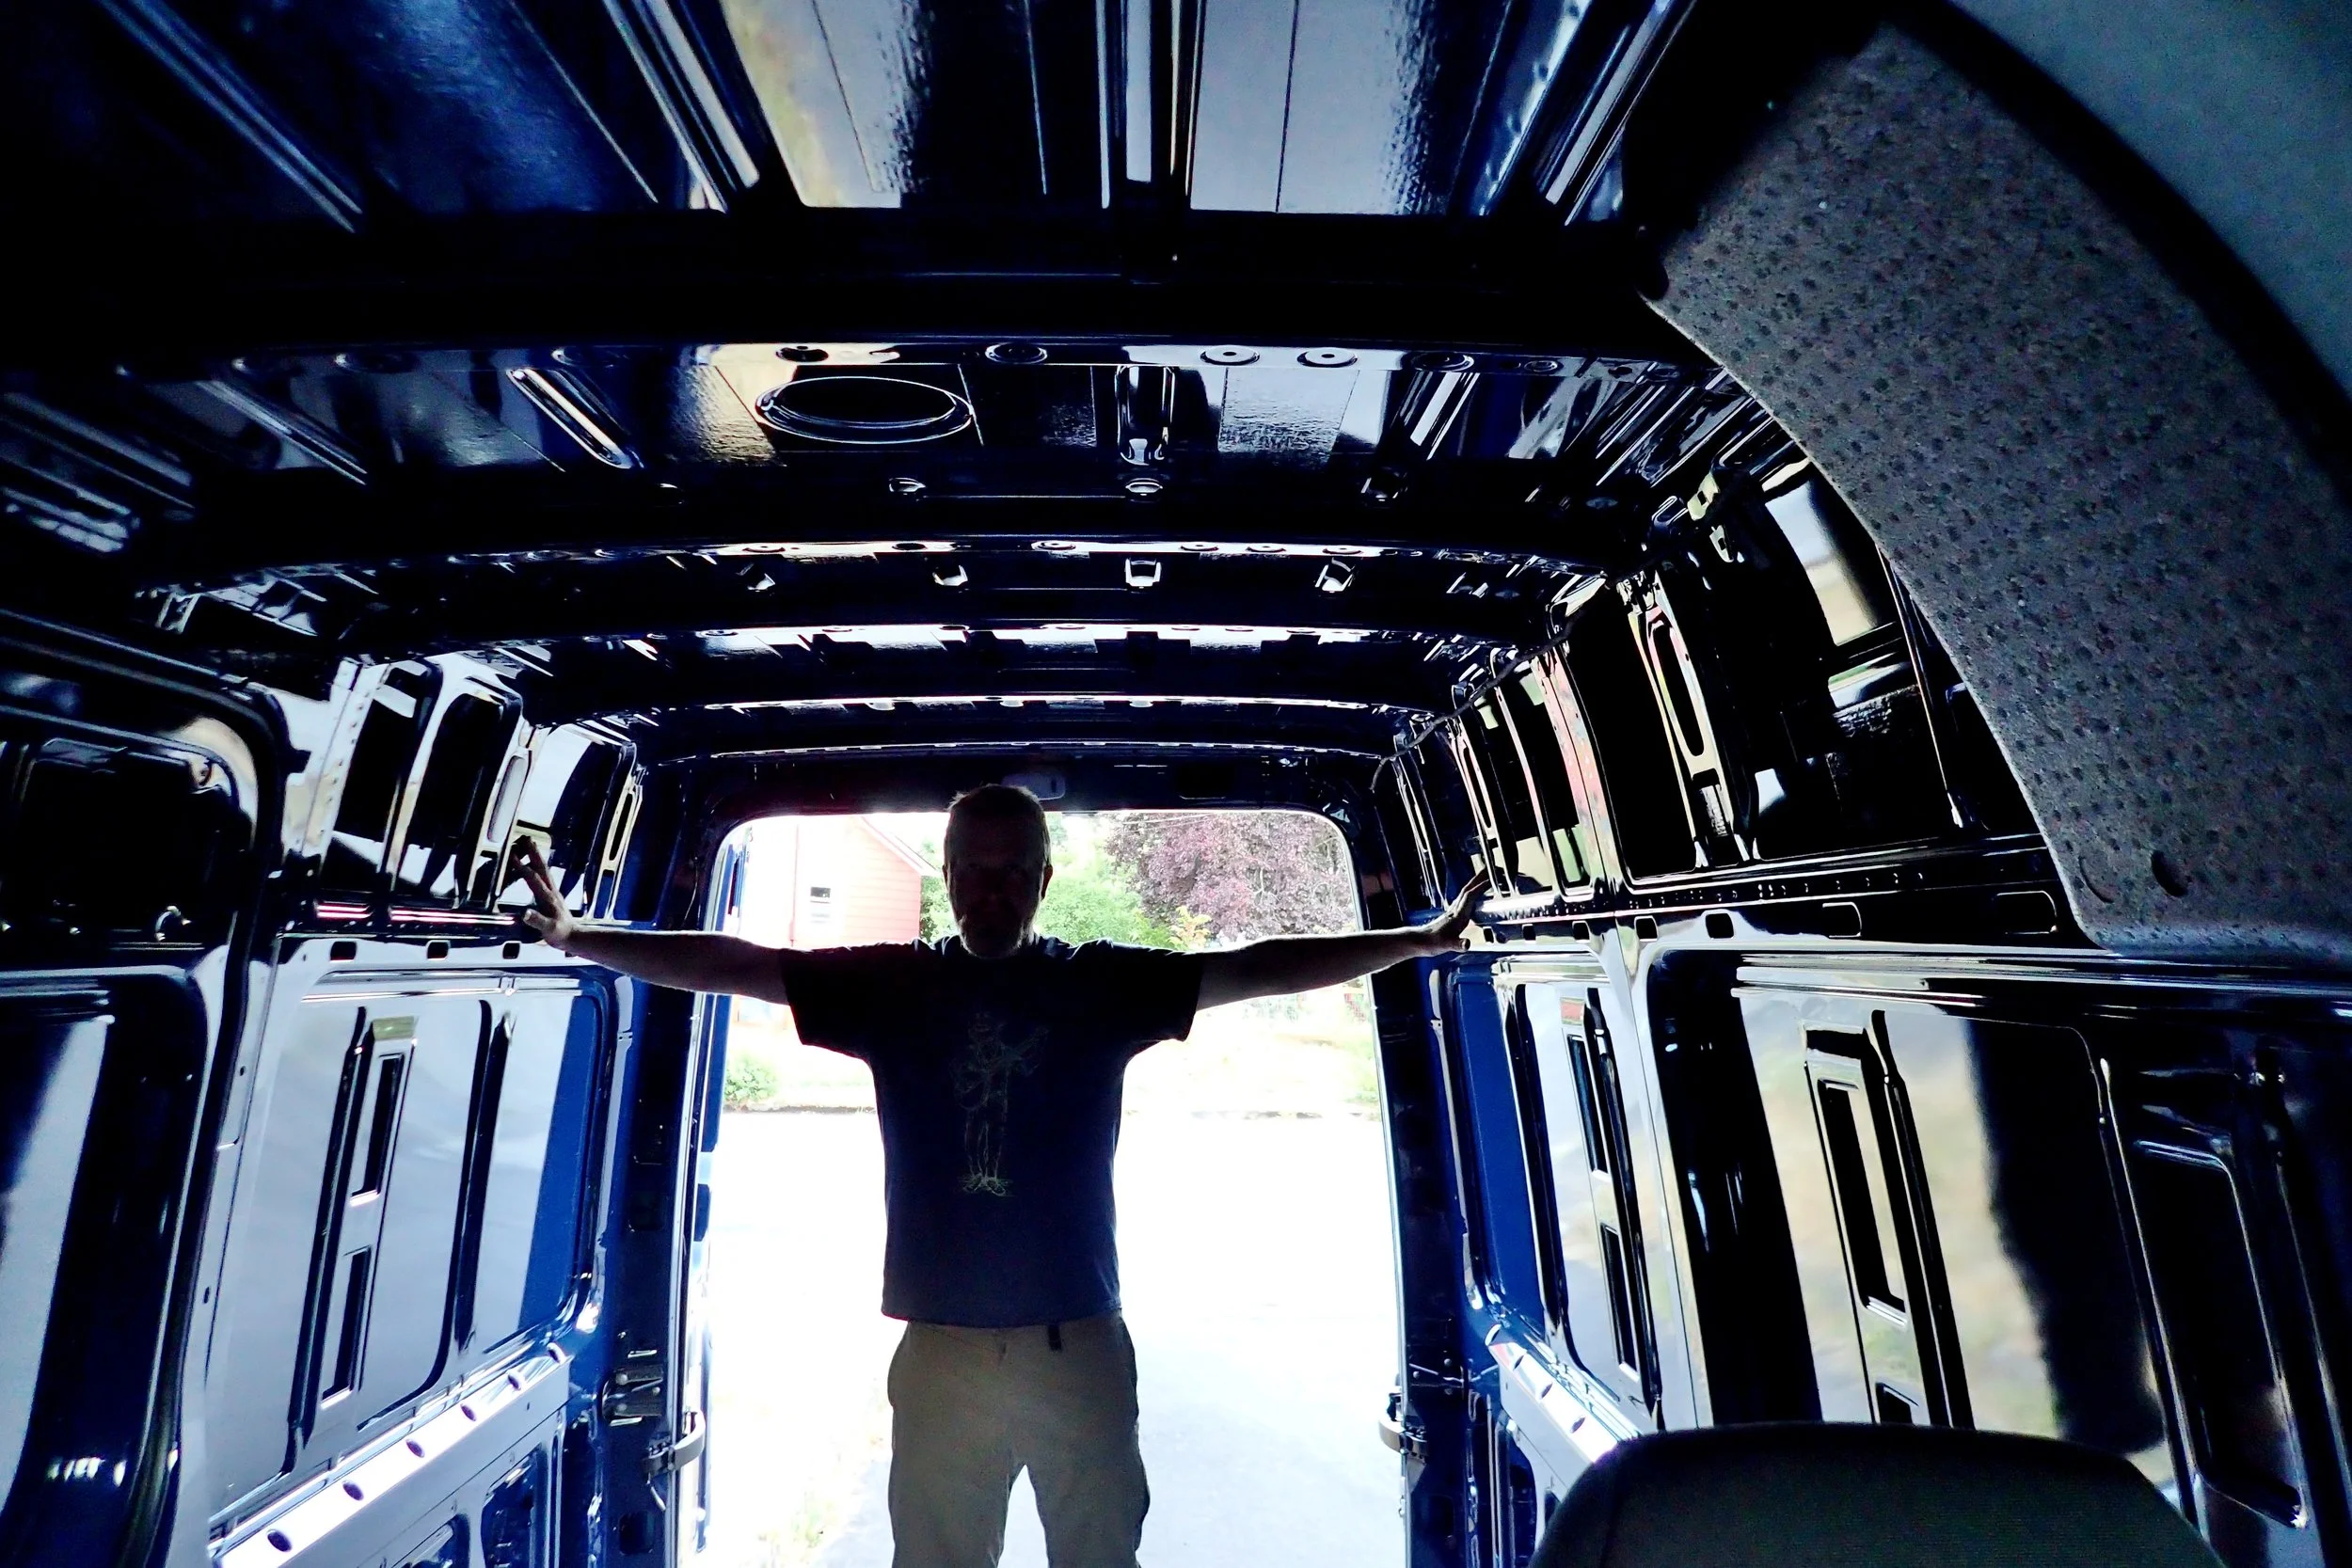
2. Bare Bones
The van was basic. I could stand up in the back and not hit my head on the ceiling. And it had four wheel drive. These were the two requirements I had in choosing my van.
I picked this color blue because I liked it.
The van’s back was plain painted blue metal with a nice plywood floor. It had no windows, no insulation, and it was ready for construction. In late summer, it was hot back there. It was though I had just purchased a blue hollow oven.
No matter, soon it would be a rolling log cabin on wheels.

1. The Beginning of the Van Project
My van project started with a 2017 Mercedes Benz Sprinter 4X4 High Roof cargo van. I had ordered it in the fall of 2016, and spent a long year day dreaming, and researching what I wanted in it.On August 16, 2017, I picked it up from the dealer. It had 13 miles on it.I would do all the work myself. I work as a marine engineer aboard a small cruise ship. This job gave me all the confidence in the world to do this project. Not that I had ever installed windows, or a solar panel before. But I knew I could figure it out.
At the time, I naively guesstimated my build cost to be just above $5,000. Current me still laughs at past me.
Armed with a tape measure, a roll of blue tape and a sketch pad, I hit the road.


